Threshold Review: Rowsfire’s A109V3 and A113V1 1:1 Panels
March 3, 2026
Introduction
Not long ago, the idea of affordable cockpit building simply did not exist, with 1:1-scale parts (regardless of whether they were OEM or not) always going for more than $500 each, even if they were relatively small, like a little weather radar control unit. Given you need more than just a single part to build a cockpit, the entire combo would easily run into six digits, making it an impossible dream for people who were either not rich or not passionate enough about the A320 to put that much money into it (understandably so).
Things started changing ever-so-slightly with the advent of X-Plane 11 in 2017, the first flight simulator to provide a decent - and affordable - out of the box experience, attracting multiple developers (both add-on and hardware). The otherwise unaffordable flight simulation hardware became extremely cheap, thanks to all the competition that suddenly appeared. Everybody wanted a piece of that cake.
Not unexpectedly, general aviation enthusiasts were the first to really see the benefits of that, thanks to companies like Honeycomb and their unbeatable prices, bringing never-before-seen quality to the same price bracket once occupied by entry-level, low-quality gear that was far from decent but did the trick for most people.
Then Microsoft Flight Simulator 2020 showed up, and everything changed again: flight simulation was suddenly mainstream, with people from all over the world finally flapping their digital wings. The timing couldn’t have been more perfect, thanks to the COVID-19 lockdowns, forcing people to stay home and play games to keep themselves sane. Suddenly, playing with a controller or basic gear wasn’t enough, and people wanted more options, which were duly delivered by mainstream manufacturers like Thrustmaster with their Airbus and Boeing sets priced at a very welcoming bracket.
But people wanted more than just joysticks and throttles. They wanted their own overhead panels, MCDUs and FMCs, Flight Control Units, tillers, etc. Those have been around for ages, but at unattainable price brackets, at least from a hobbyist standpoint. That’s when companies like Rowsfire step in, offering high-quality alternatives at a much more affordable price.
The A109V3 and the A113V1 were my first tango with 1:1 hardware for flight simulation, and I had absolutely no idea of what to expect at first, since I couldn’t really afford to build an actual A320 cockpit; they’d be mostly loose units spread around my desk, but I figured it would be fun to try it out regardless.
First Impressions
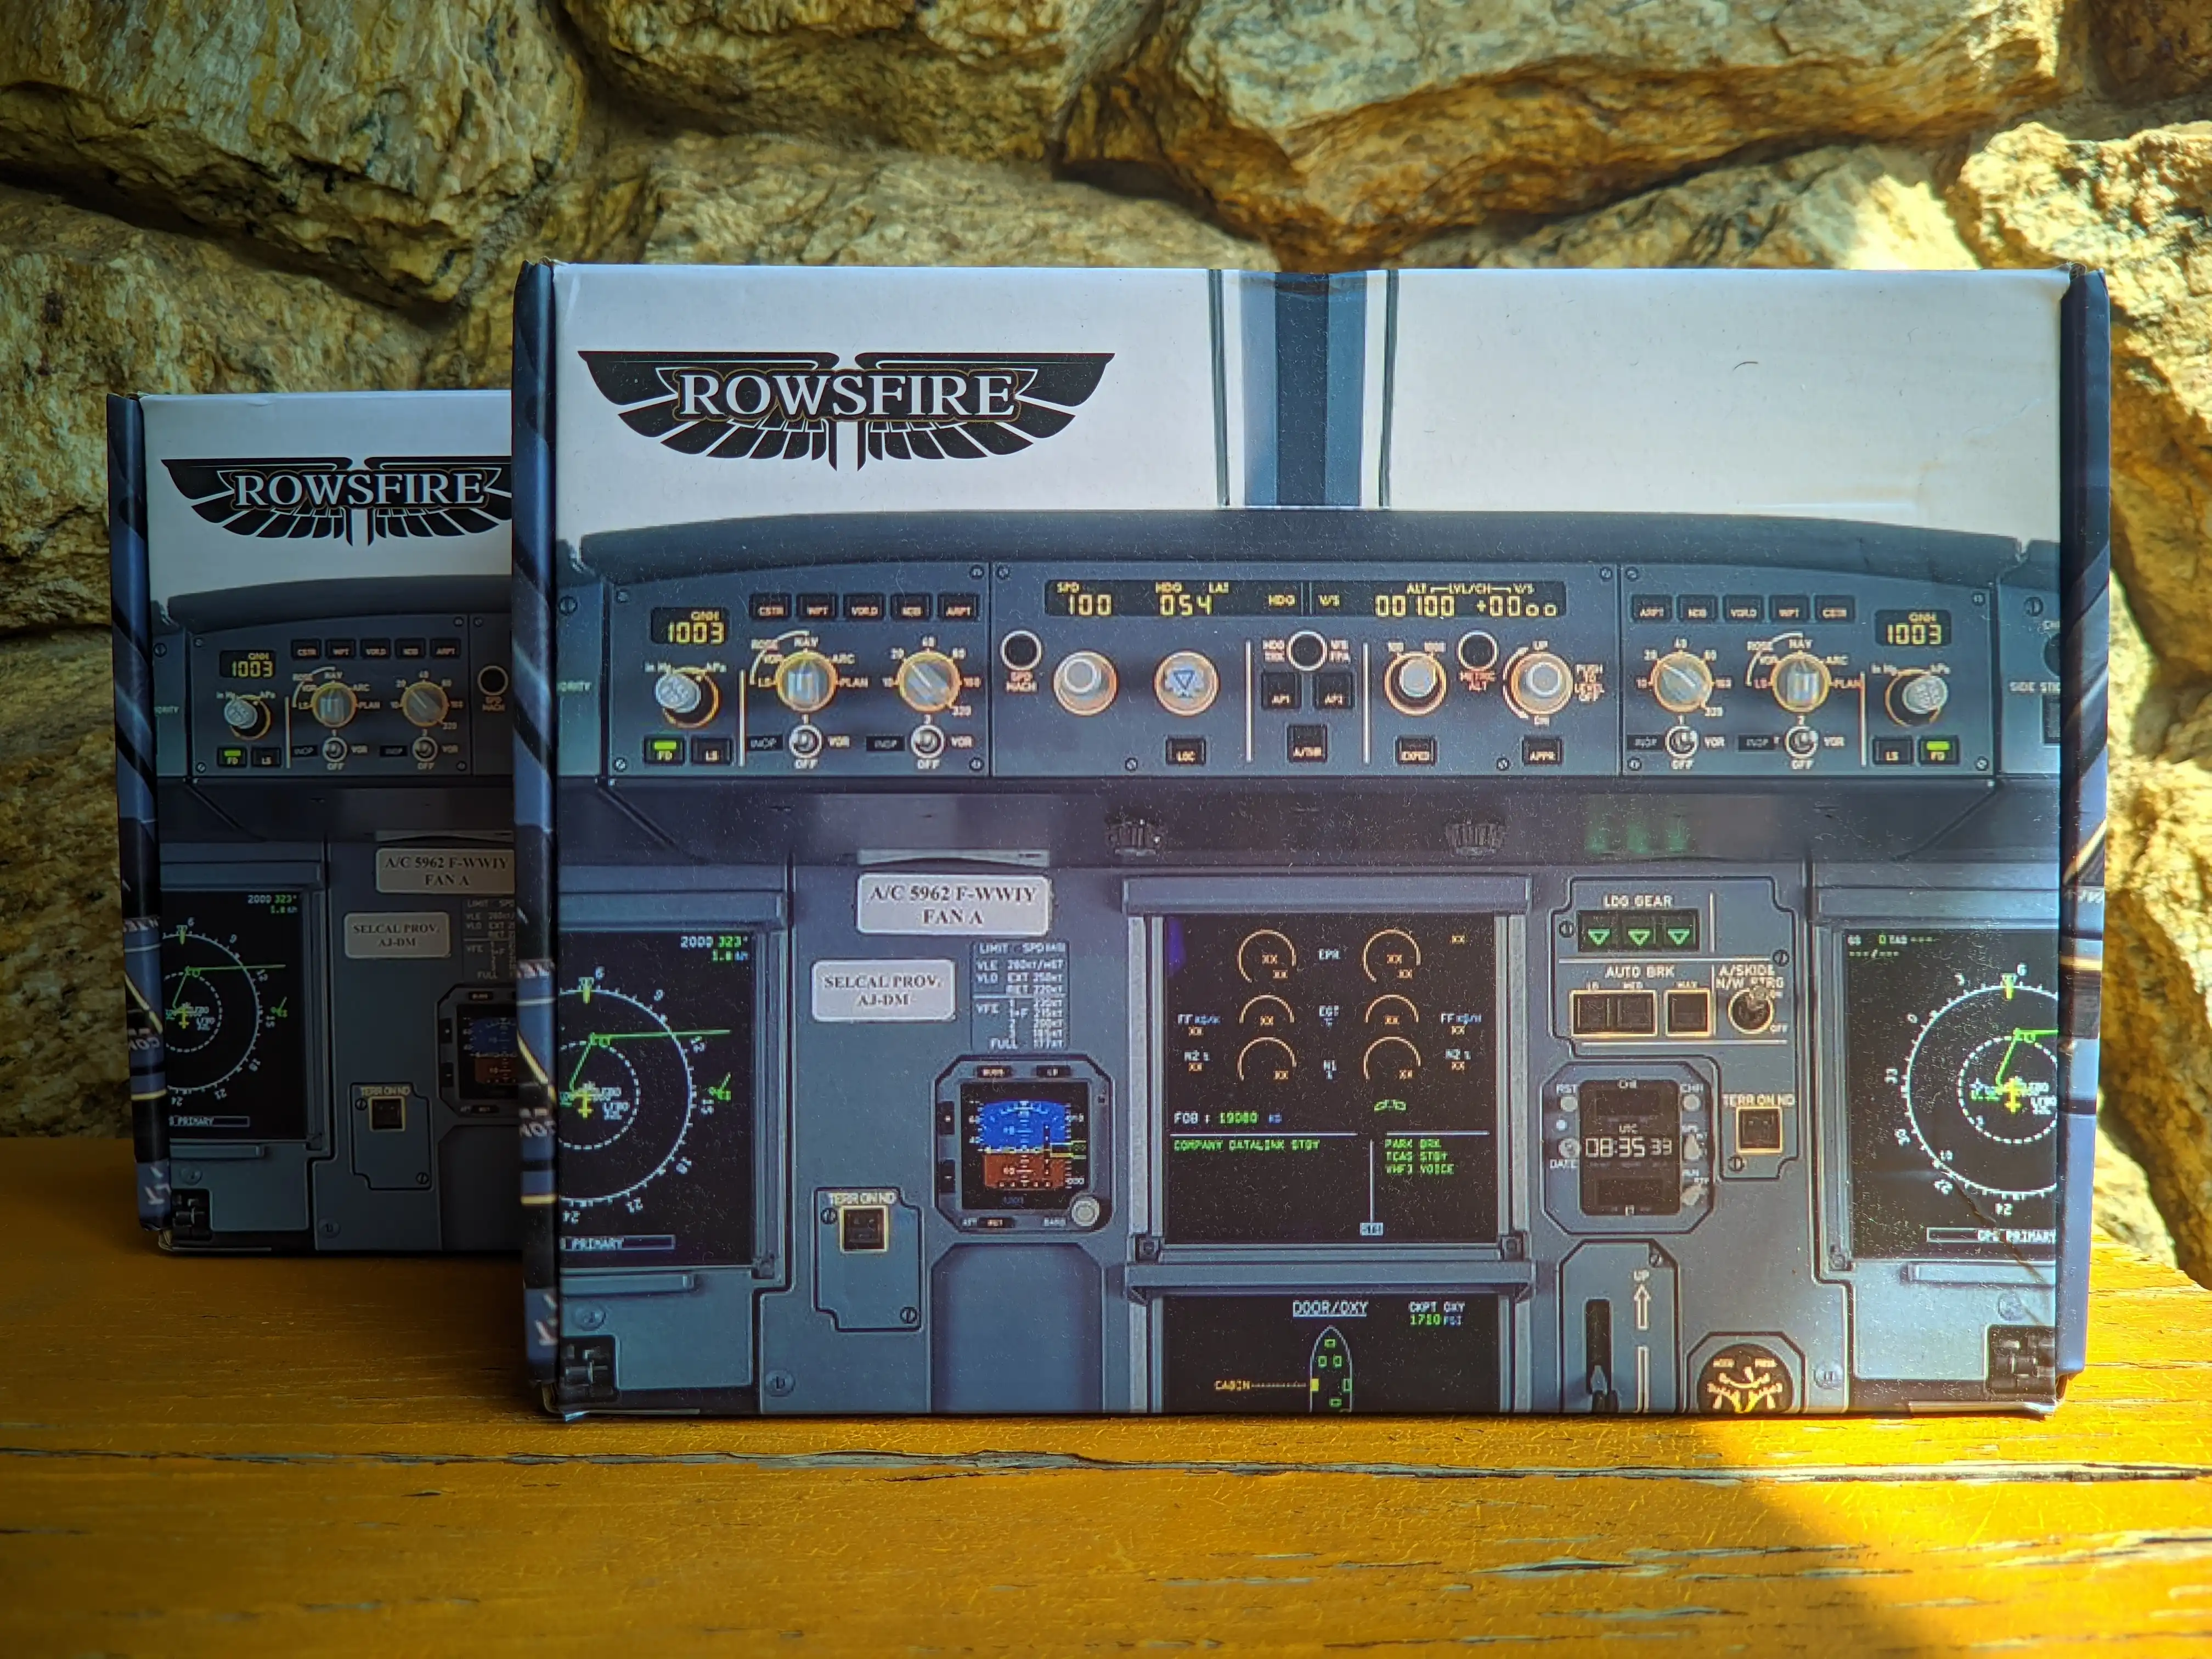
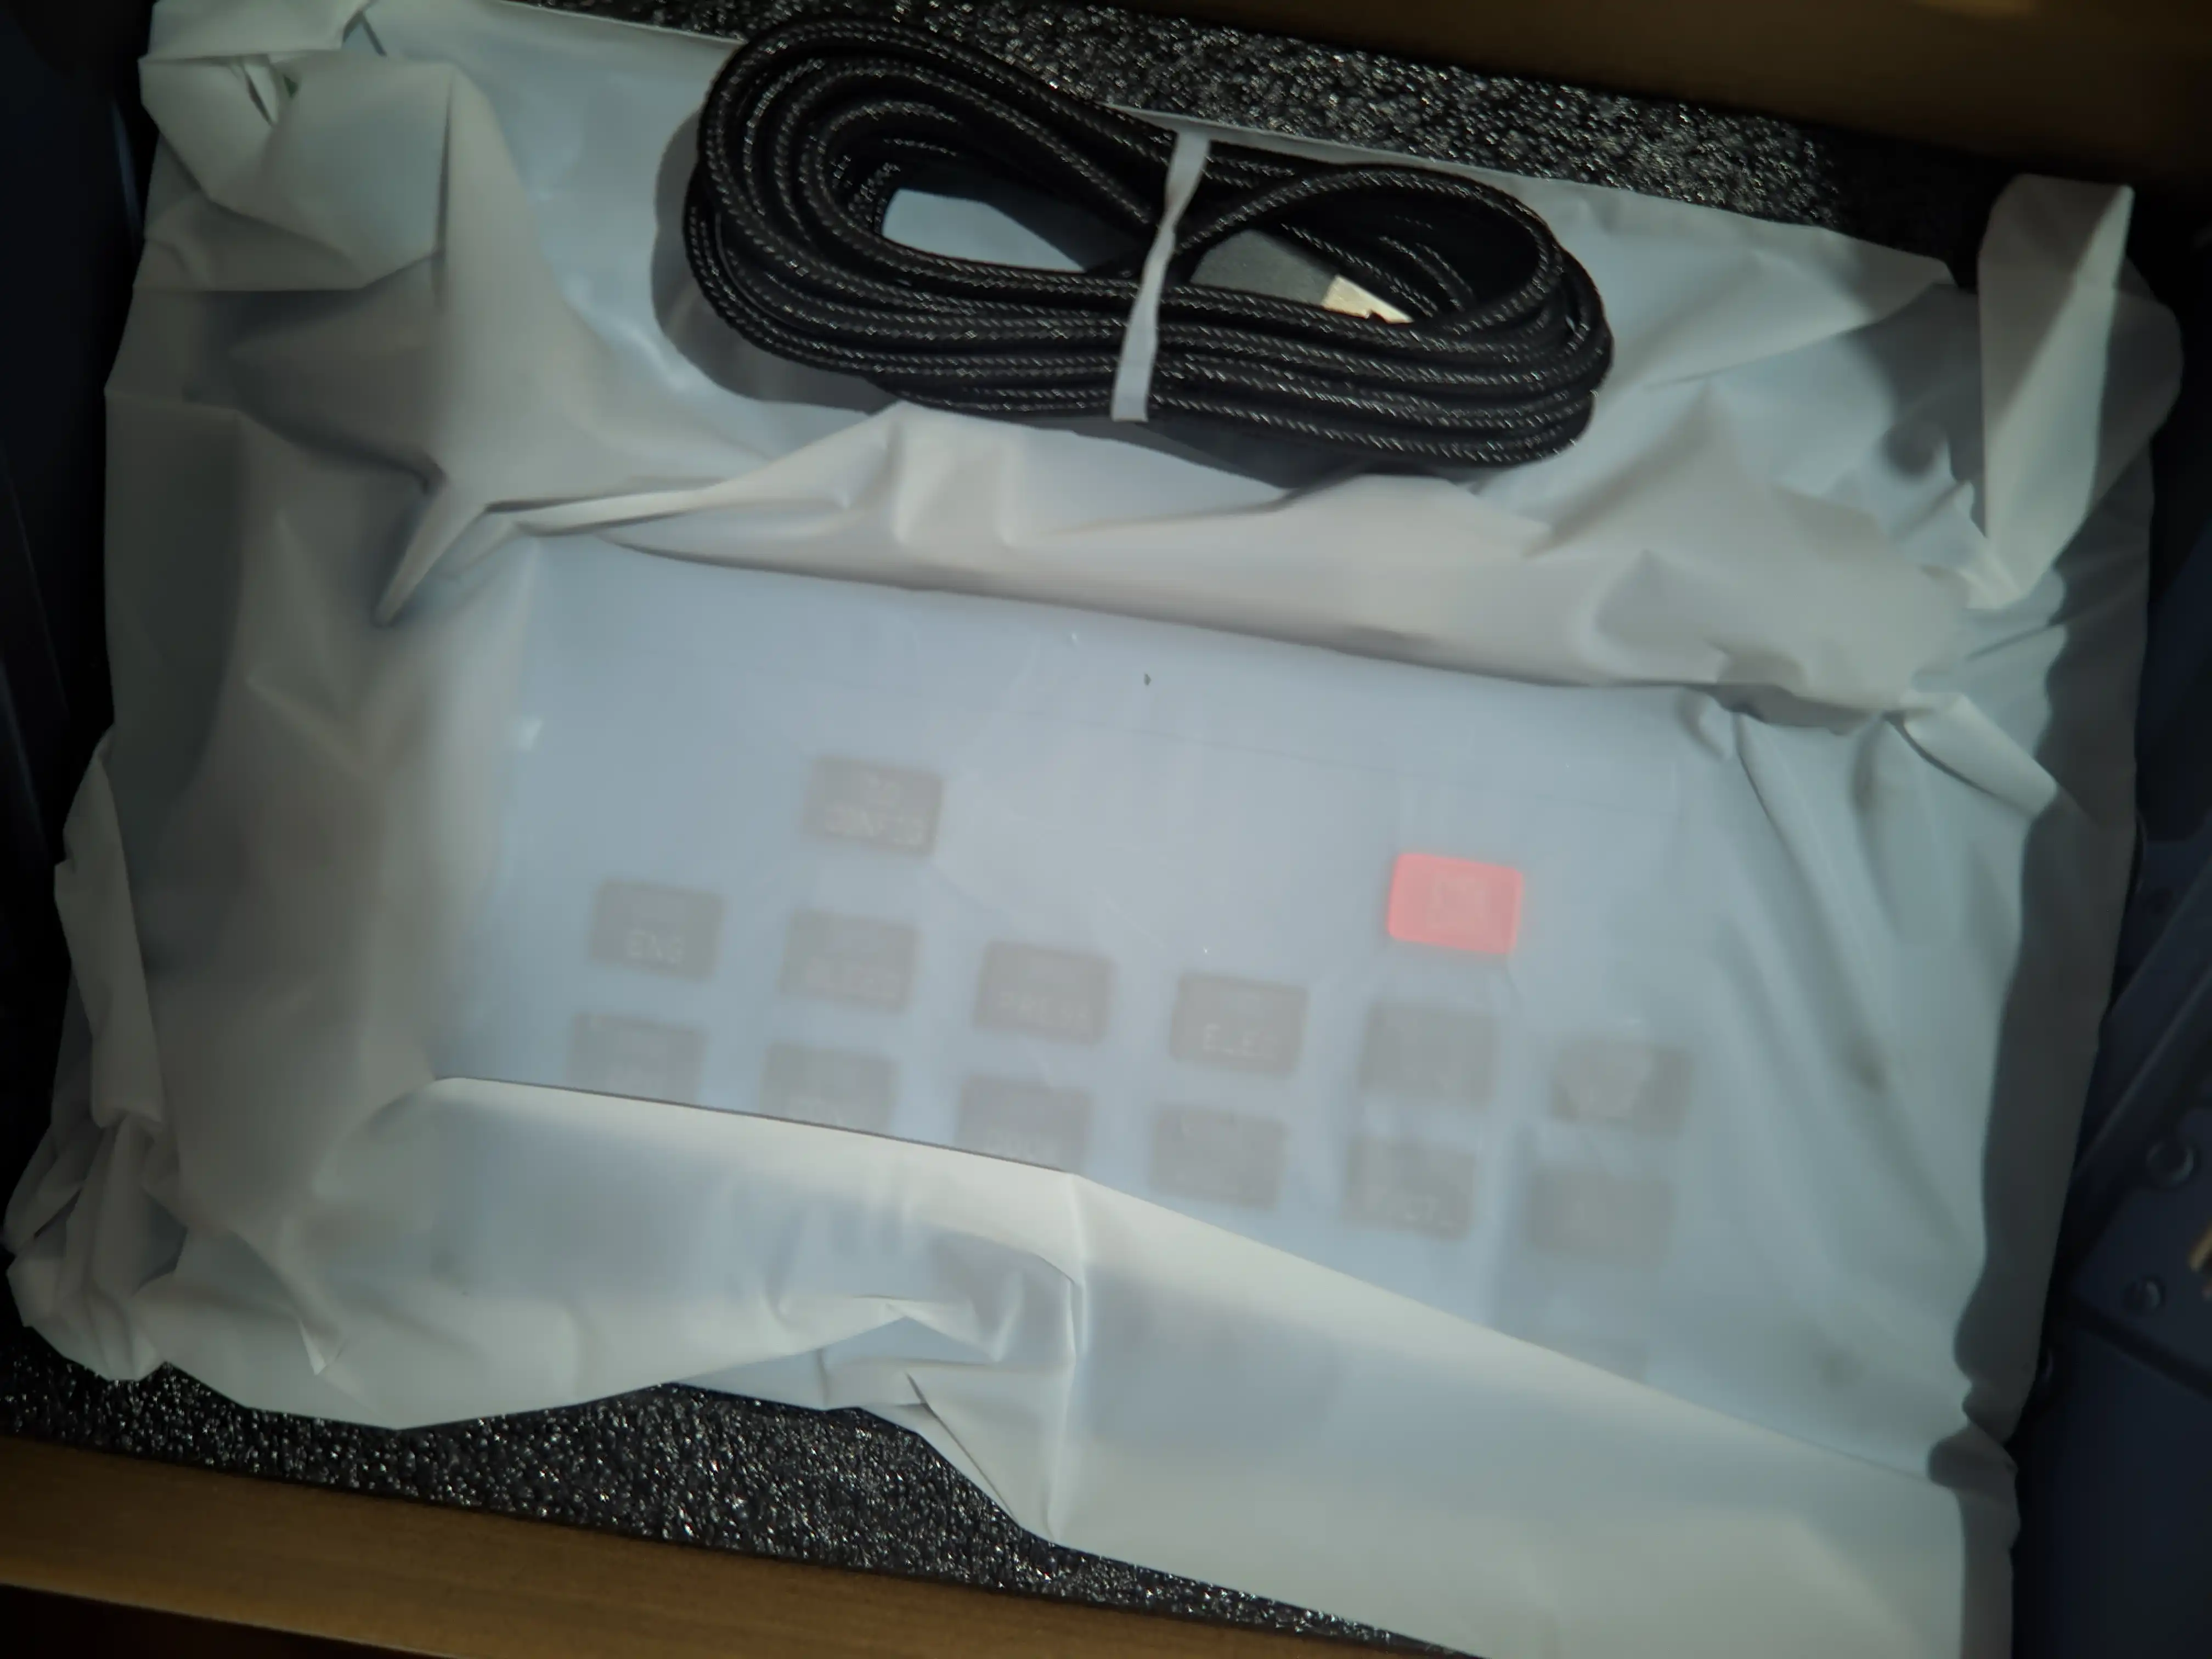
When it comes down to hardware, it’s safe to say the unboxing experience plays a huge role as far as first impressions go, which is why so many companies - Rowsfire included - put in a lot of effort to make the experience as neat as possible within the price range (obviously). It’s safe to say they have done a fantastic job at that, with very neat packaging, soft cushioning inside so the equipment doesn’t get damaged during shipping, and a comprehensive user manual, along with a QR code to download the necessary software (FSUIPC 7 and MobiFlight), and the baseline profile for the Fenix A320.


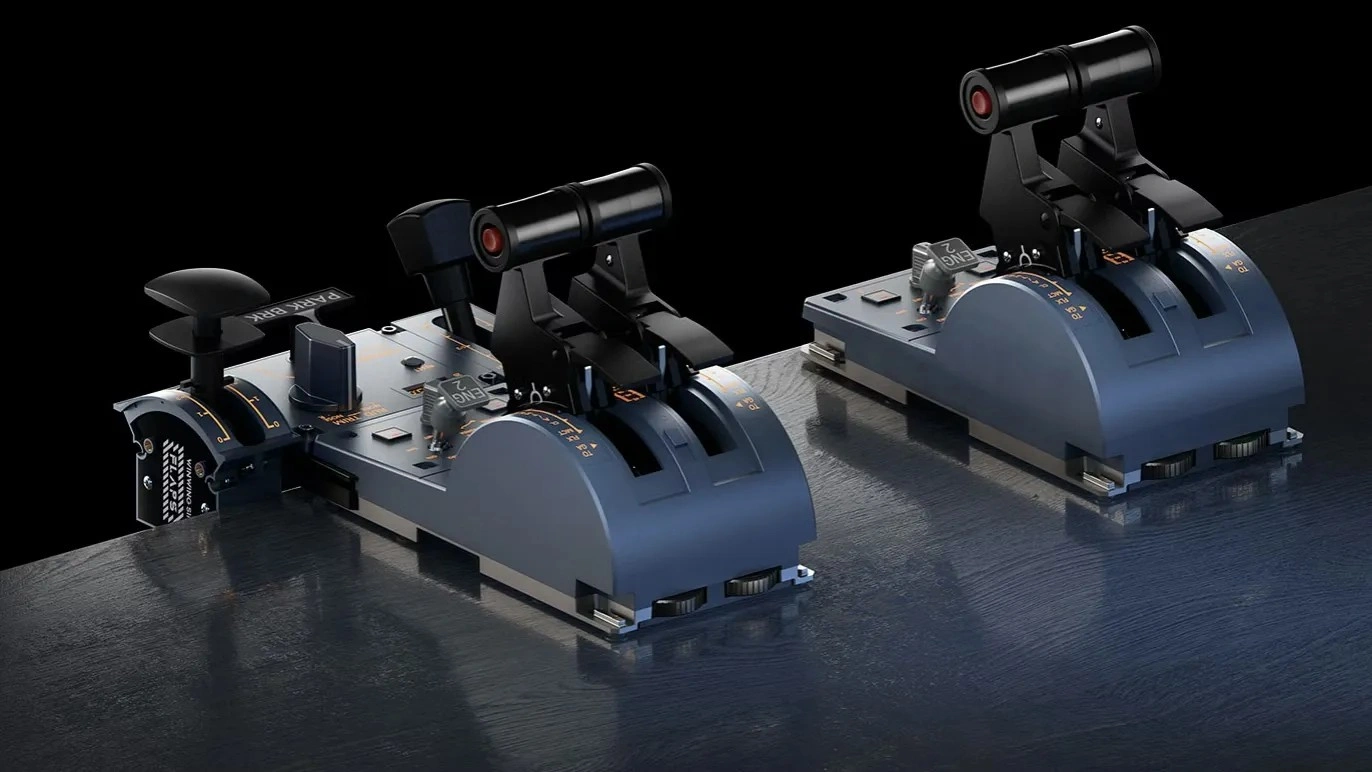
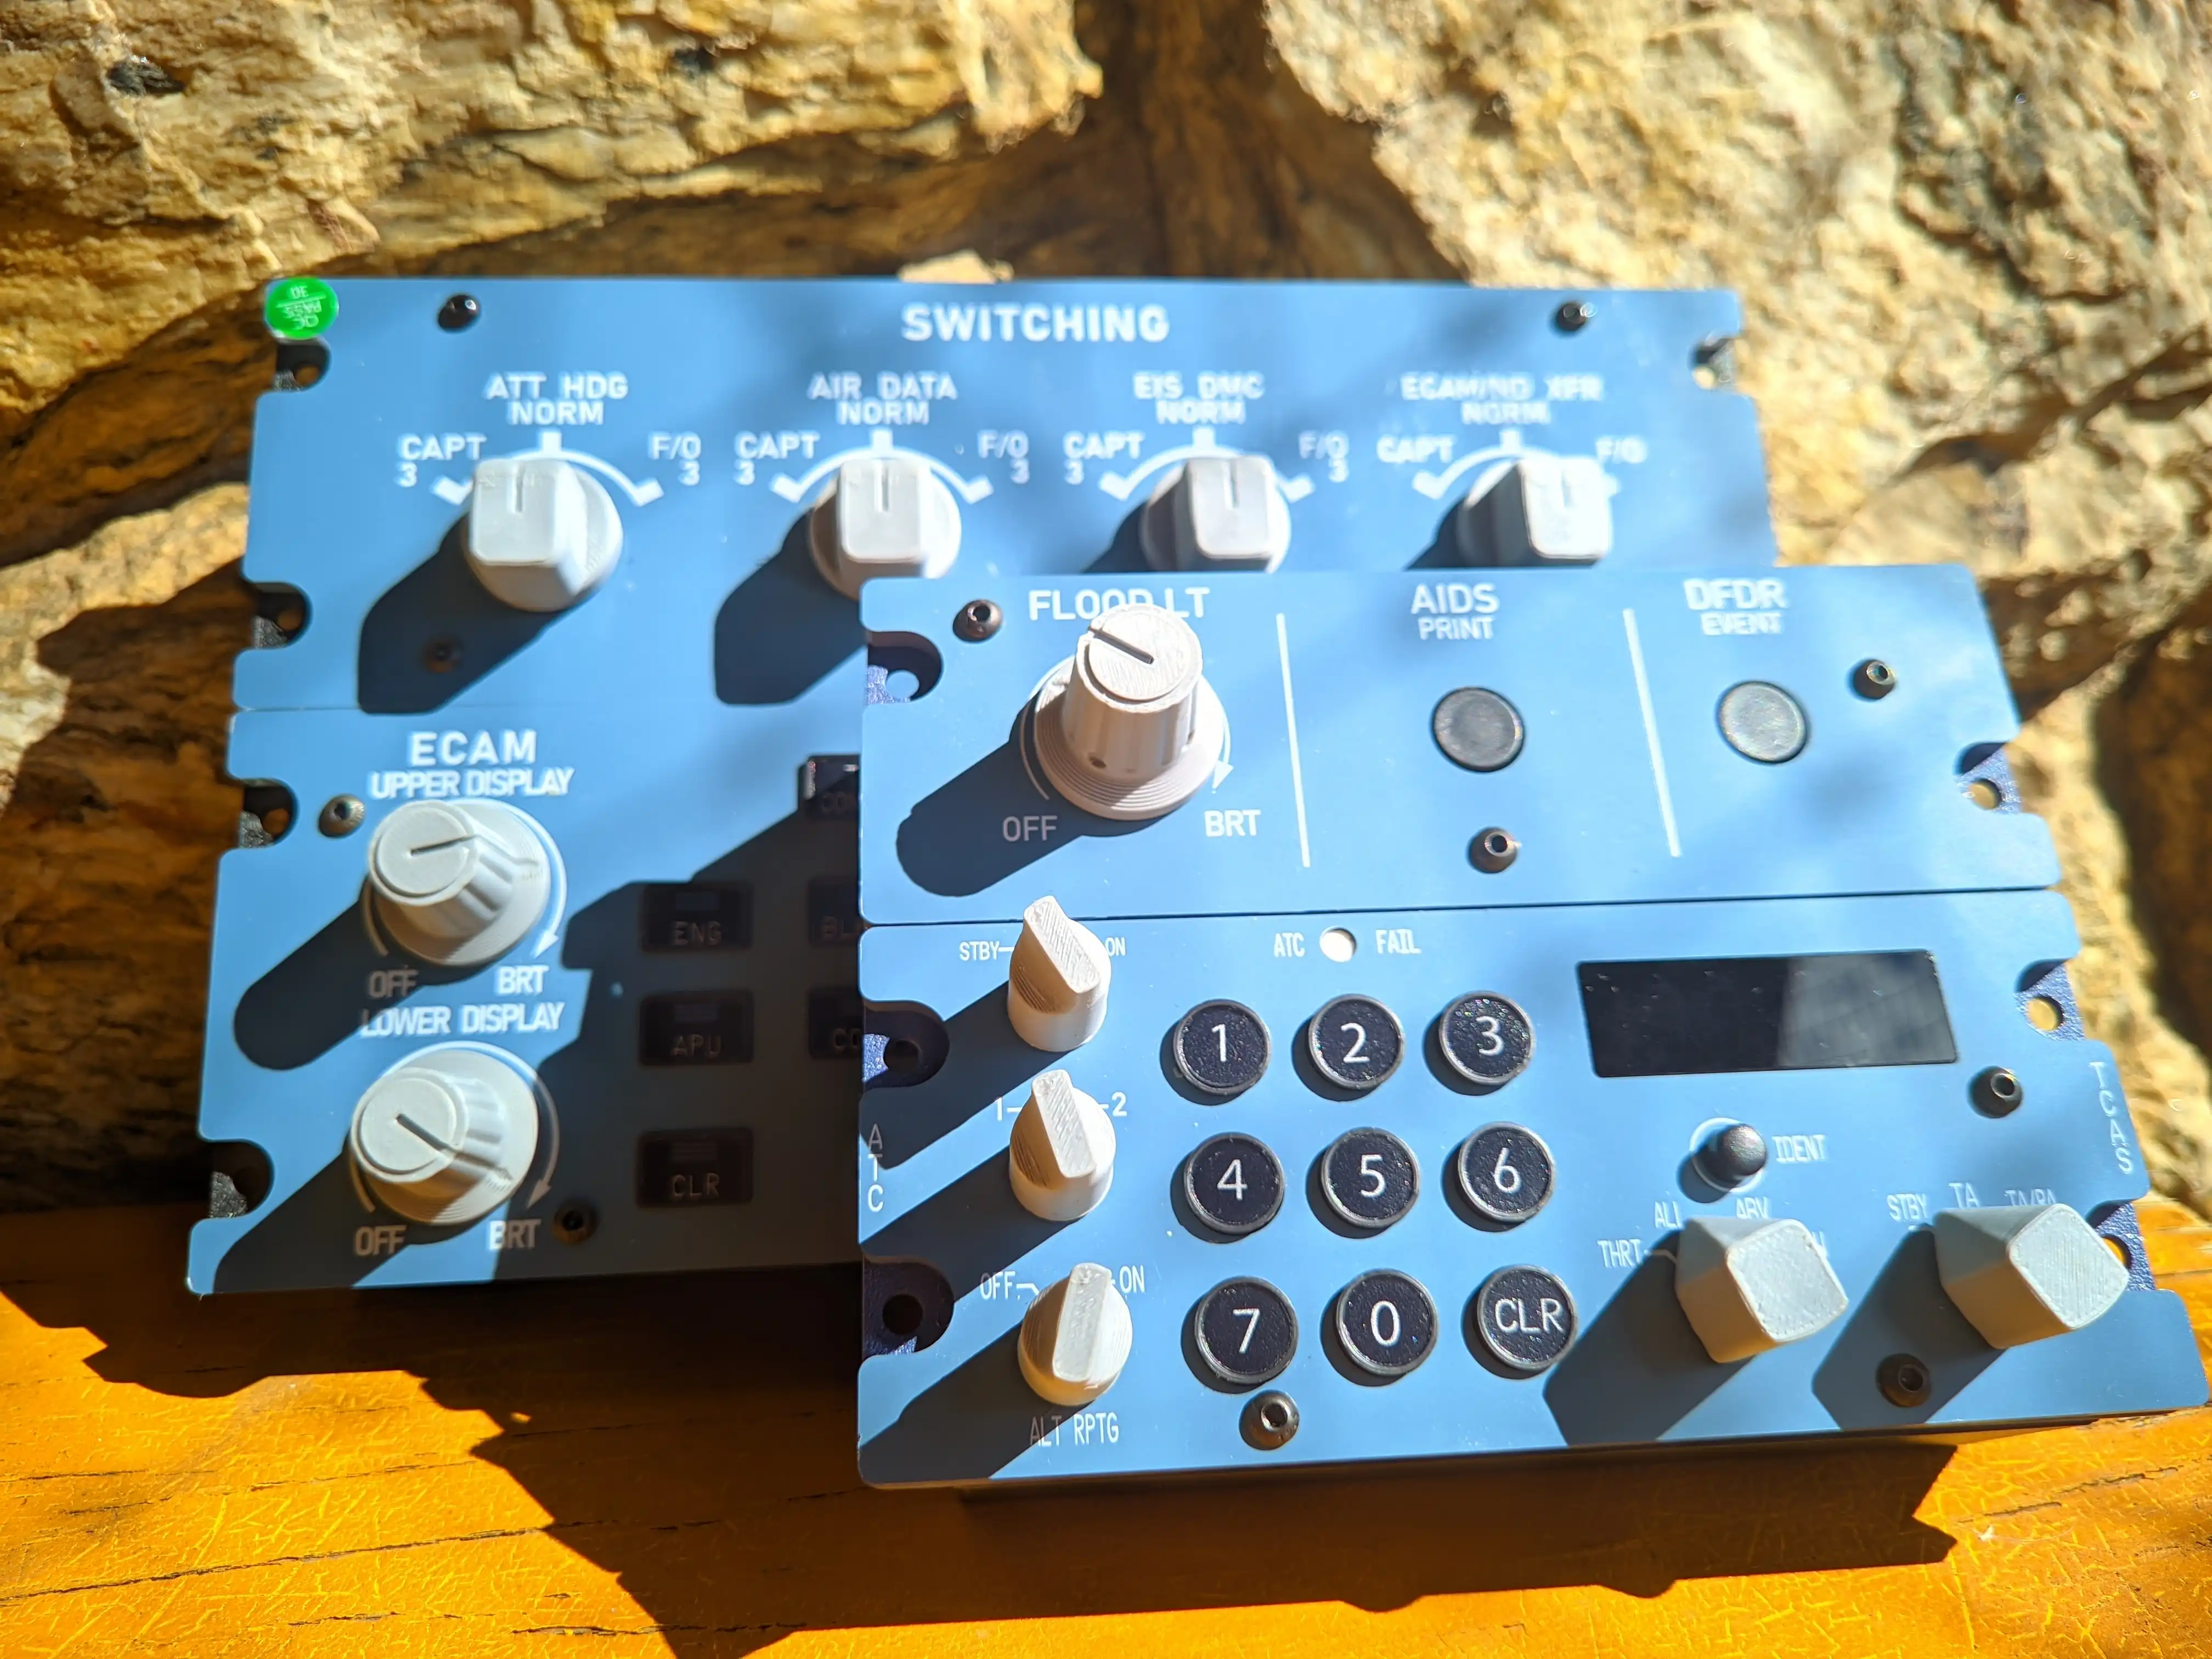
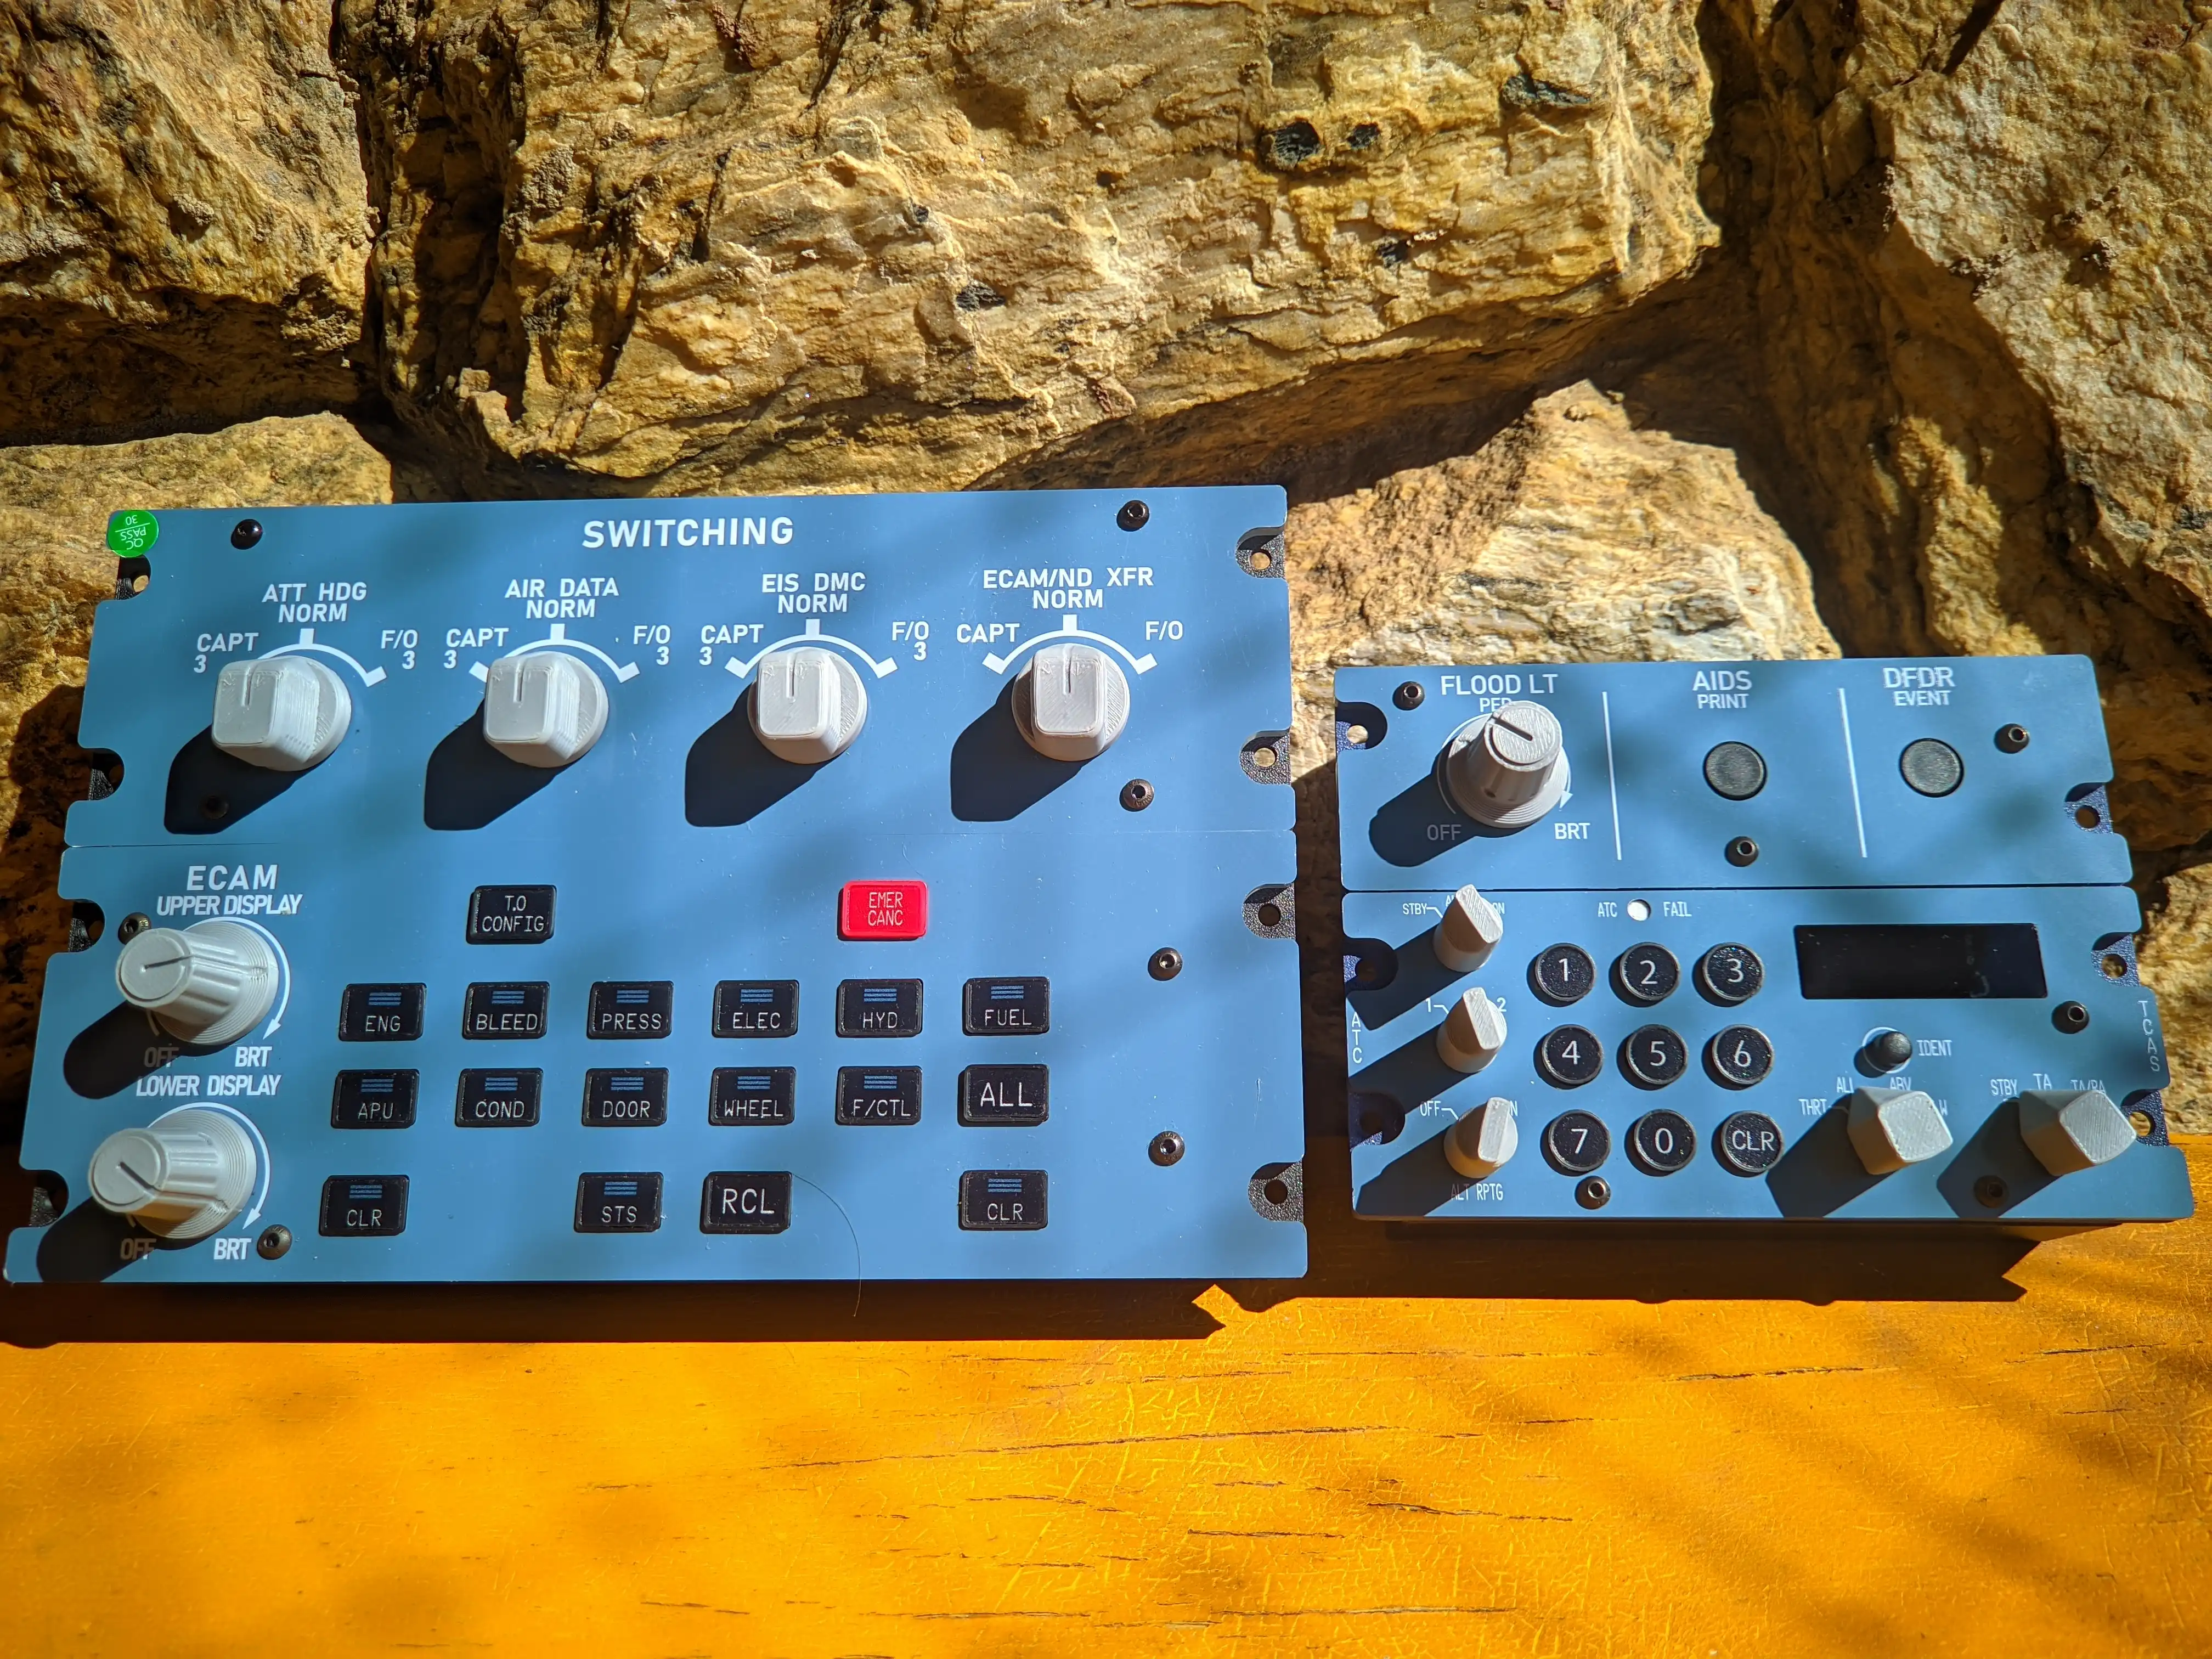
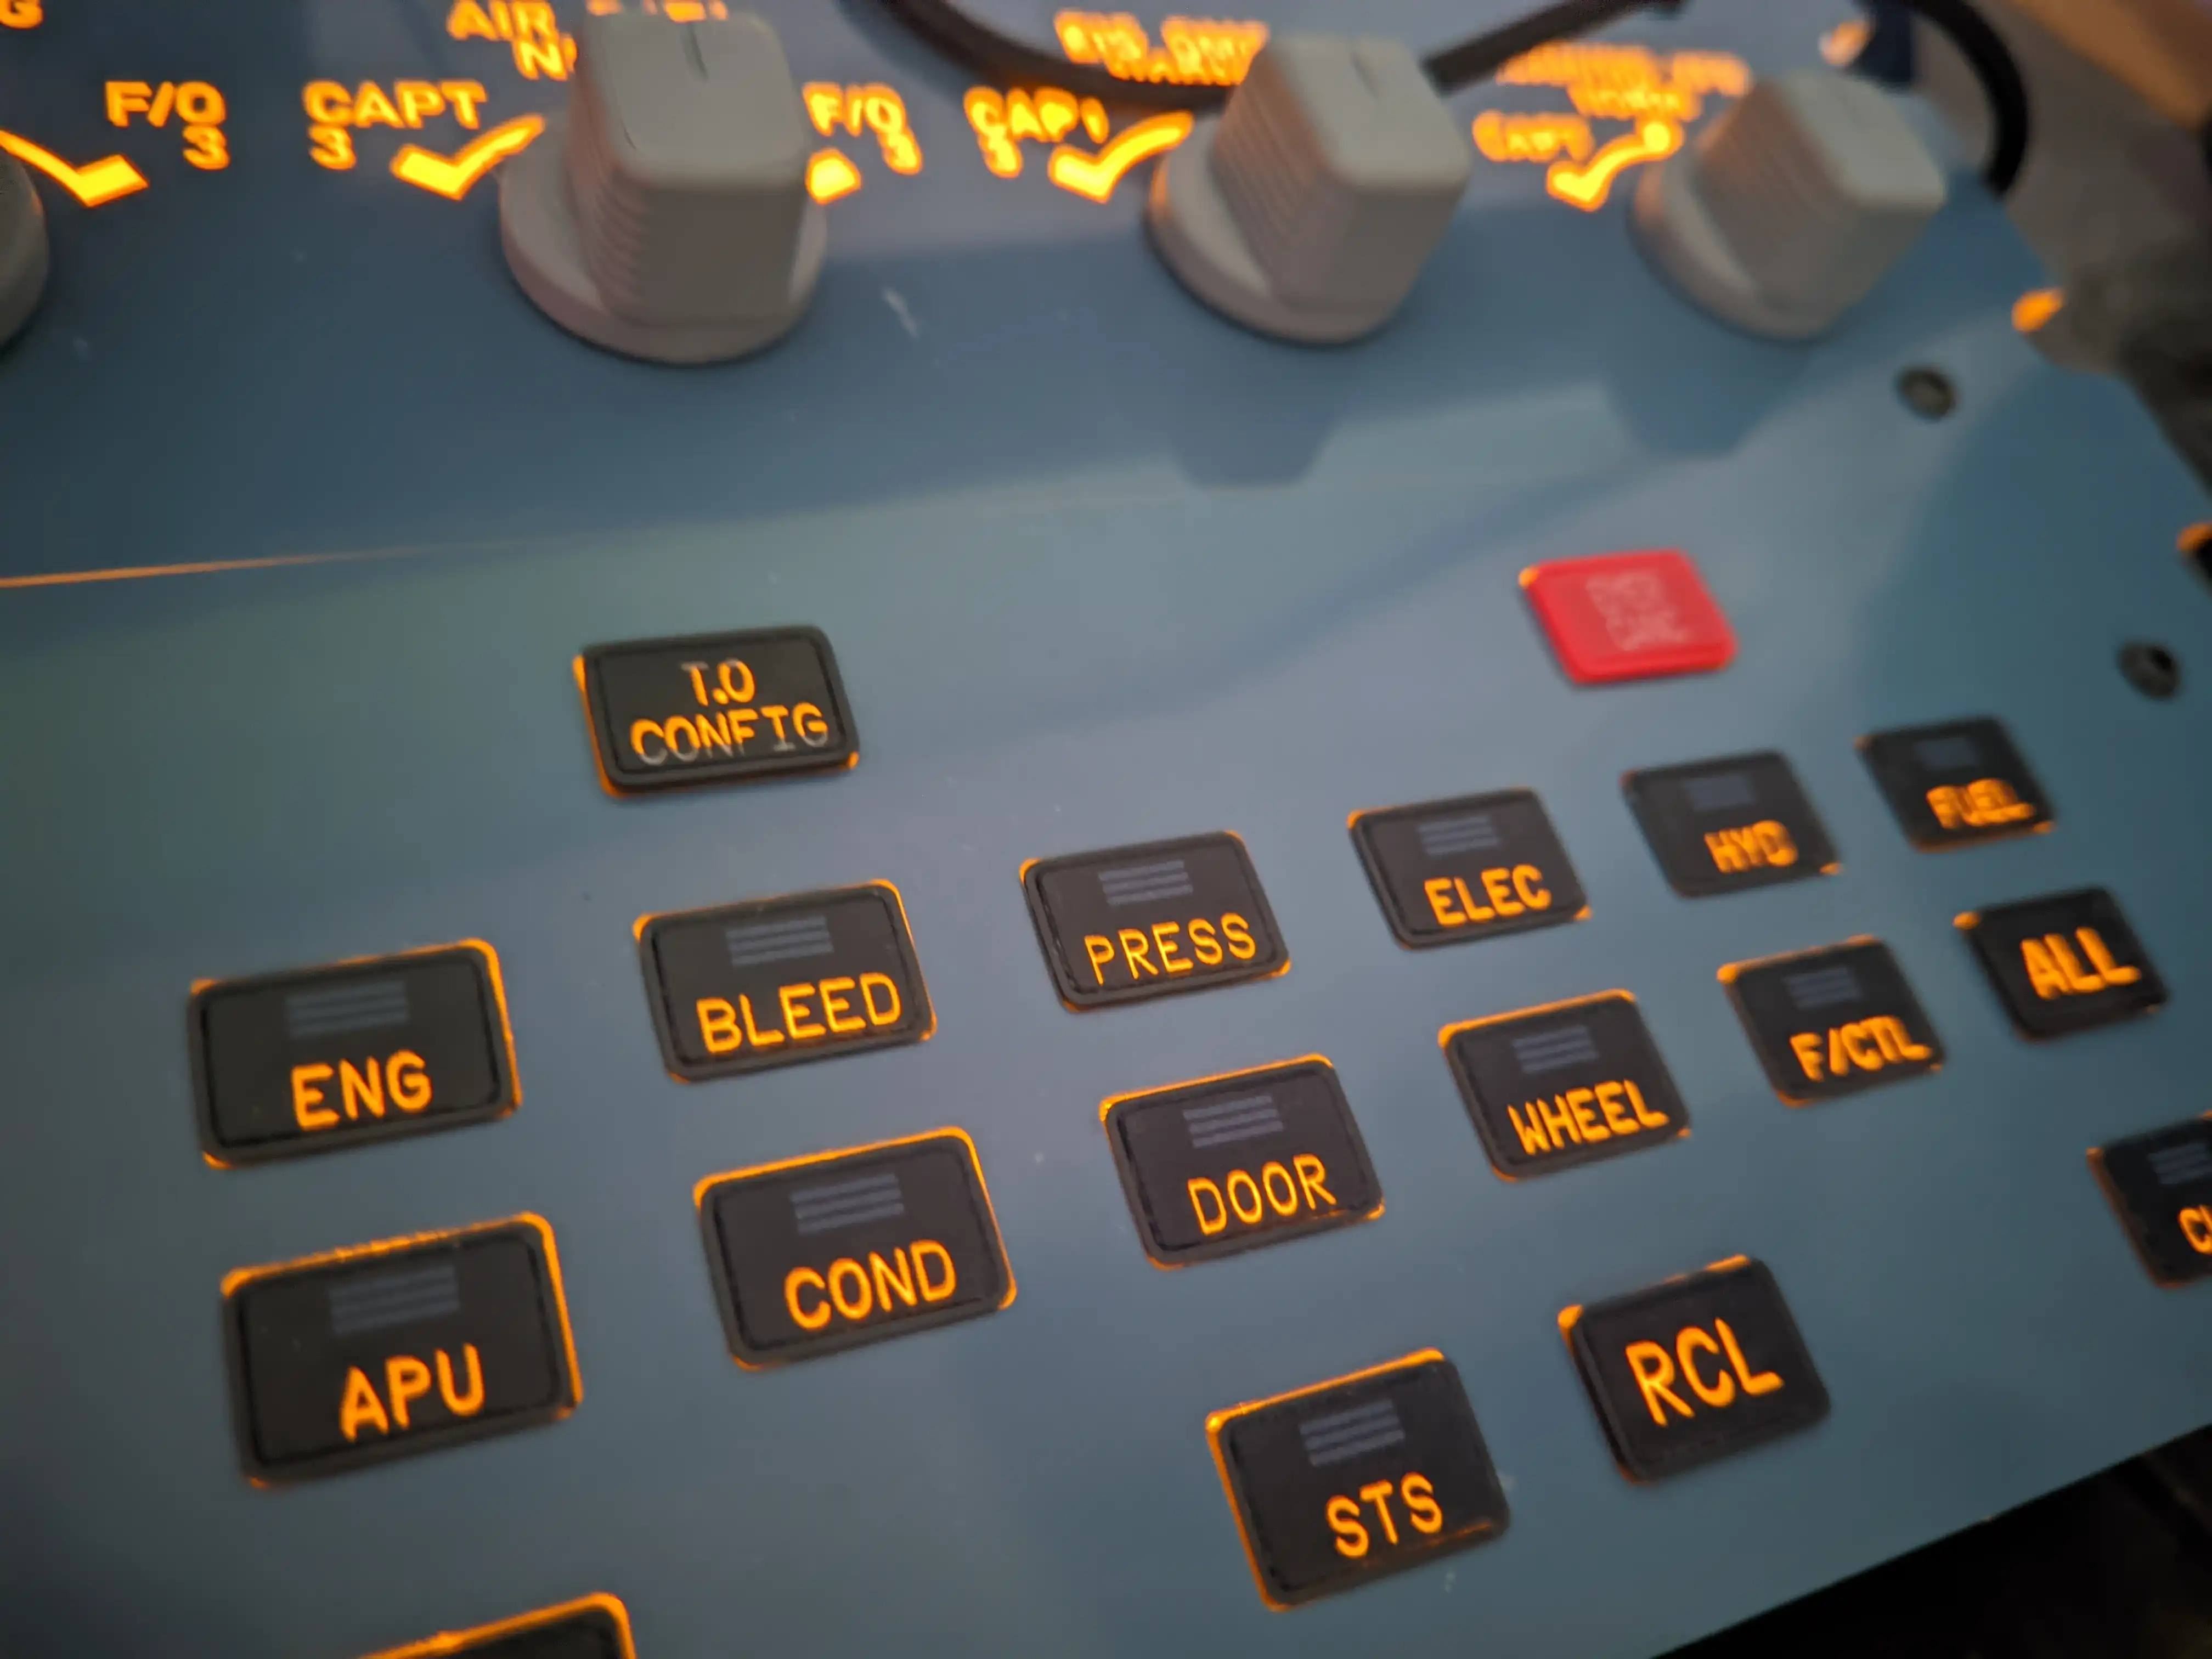
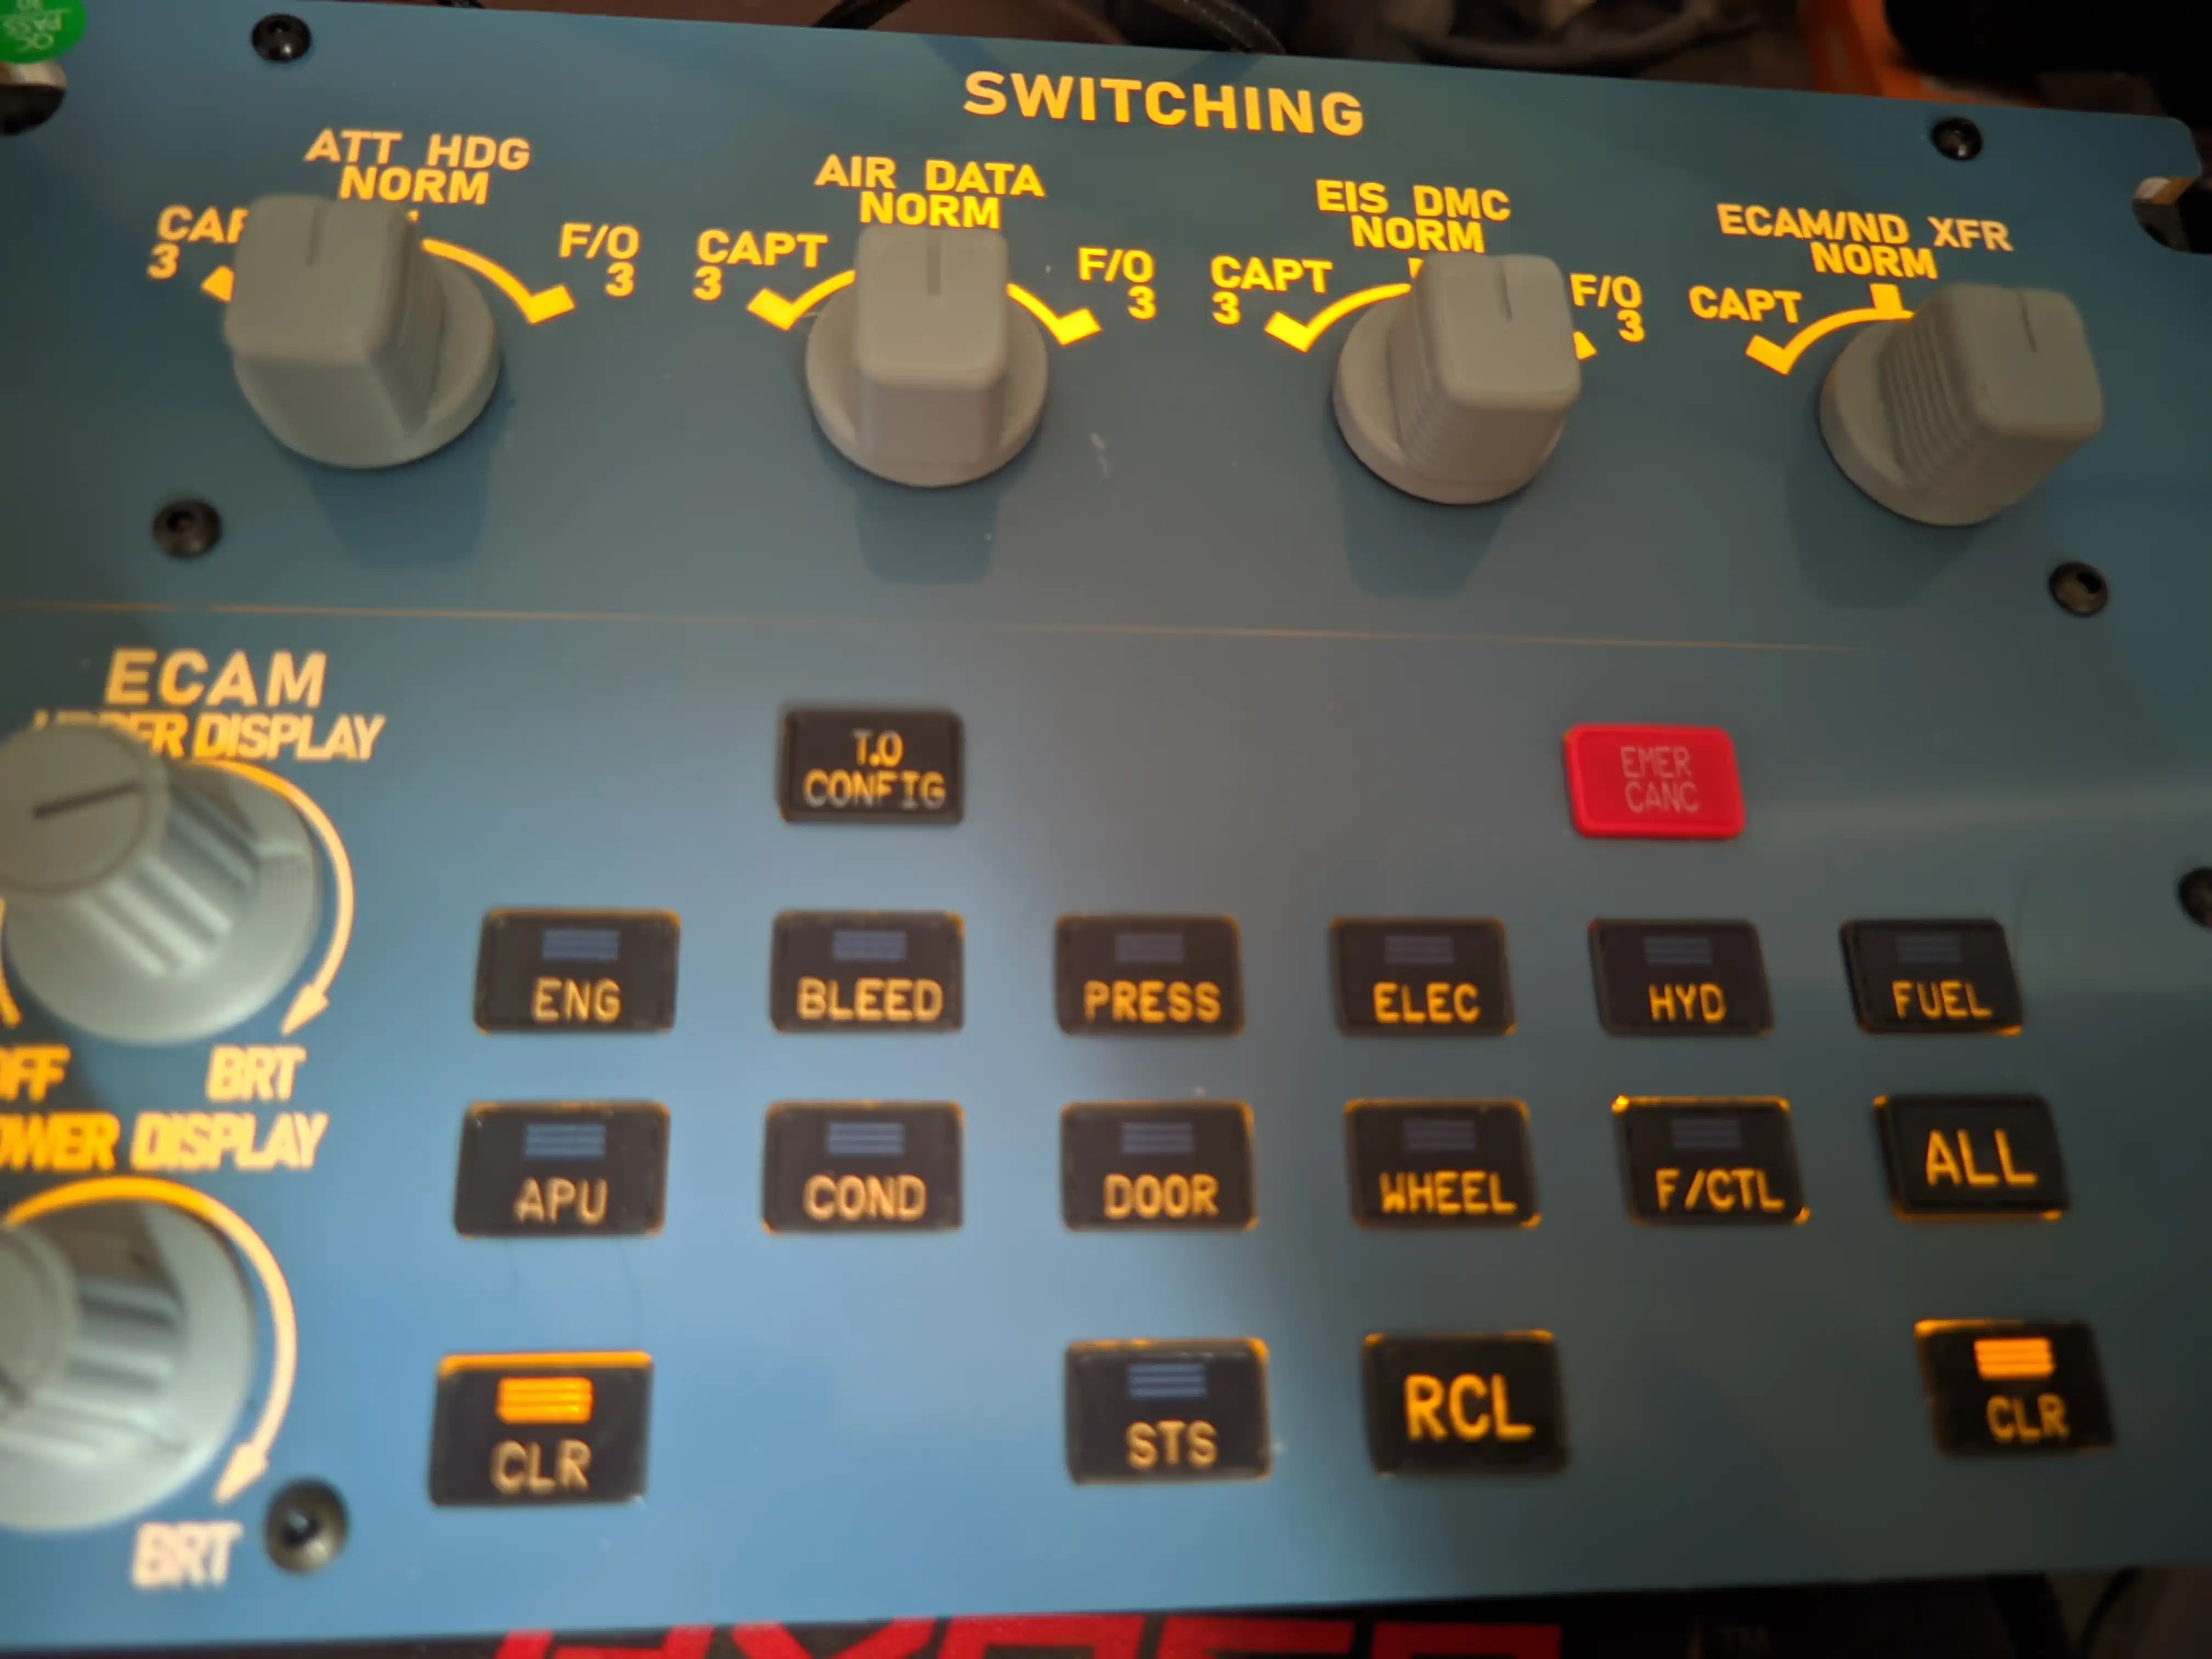
The A109V3 (ECAM SWITCHING panel) was the first one I unboxed, and it felt extremely solid and well-built from the get go, with neatly 3D printed knobs, buttons with a nice tactile feel (apparently they are supposed to mimic how the real ones feel, but I can’t compare that since I don’t have access to a real A320 family flight deck). Regardless of whether it feels like the real thing, the tactile experience is satisfying, to say the very least.

As the unit is meant to be slid into a pedestal set alongside their other 1:1 panels, the USB-C port (yes, they use USB-C!) is located around the back of the product, which posed an initial challenge to me since I don’t really have a cockpit just yet, but I managed to quickly address that by putting an object underneath so that it could sit on my table comfortably without putting strain on the cable.
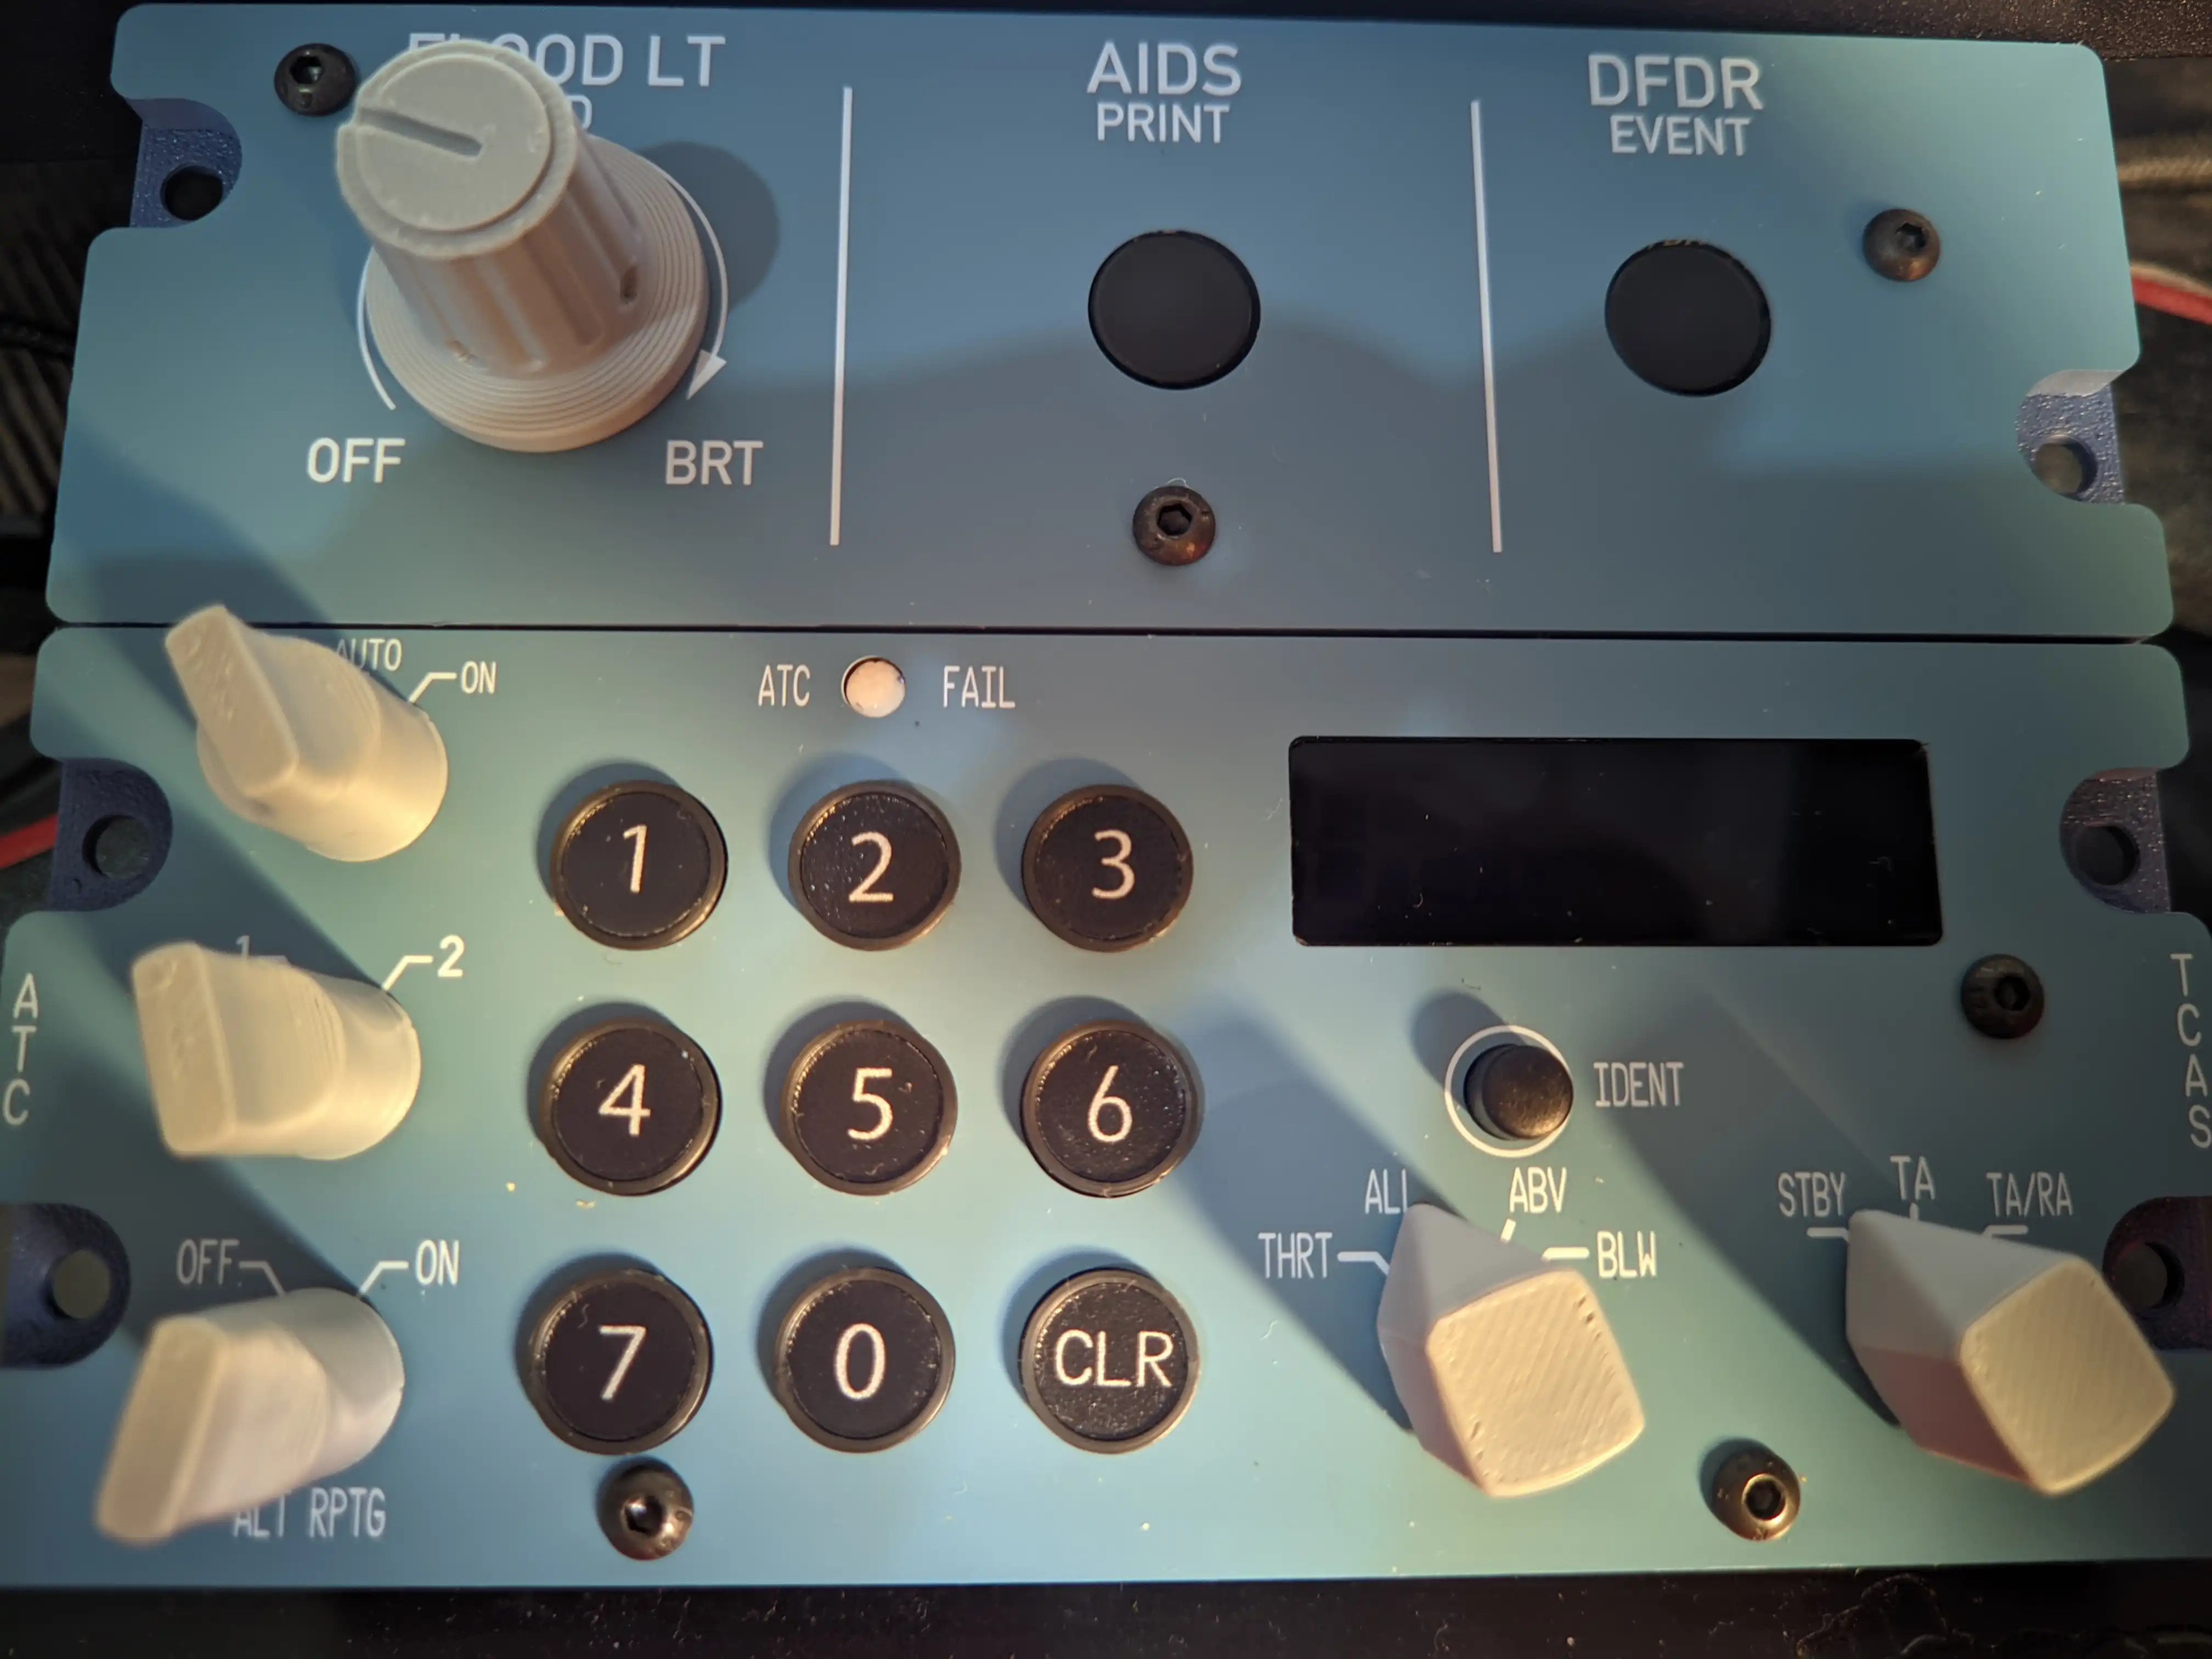
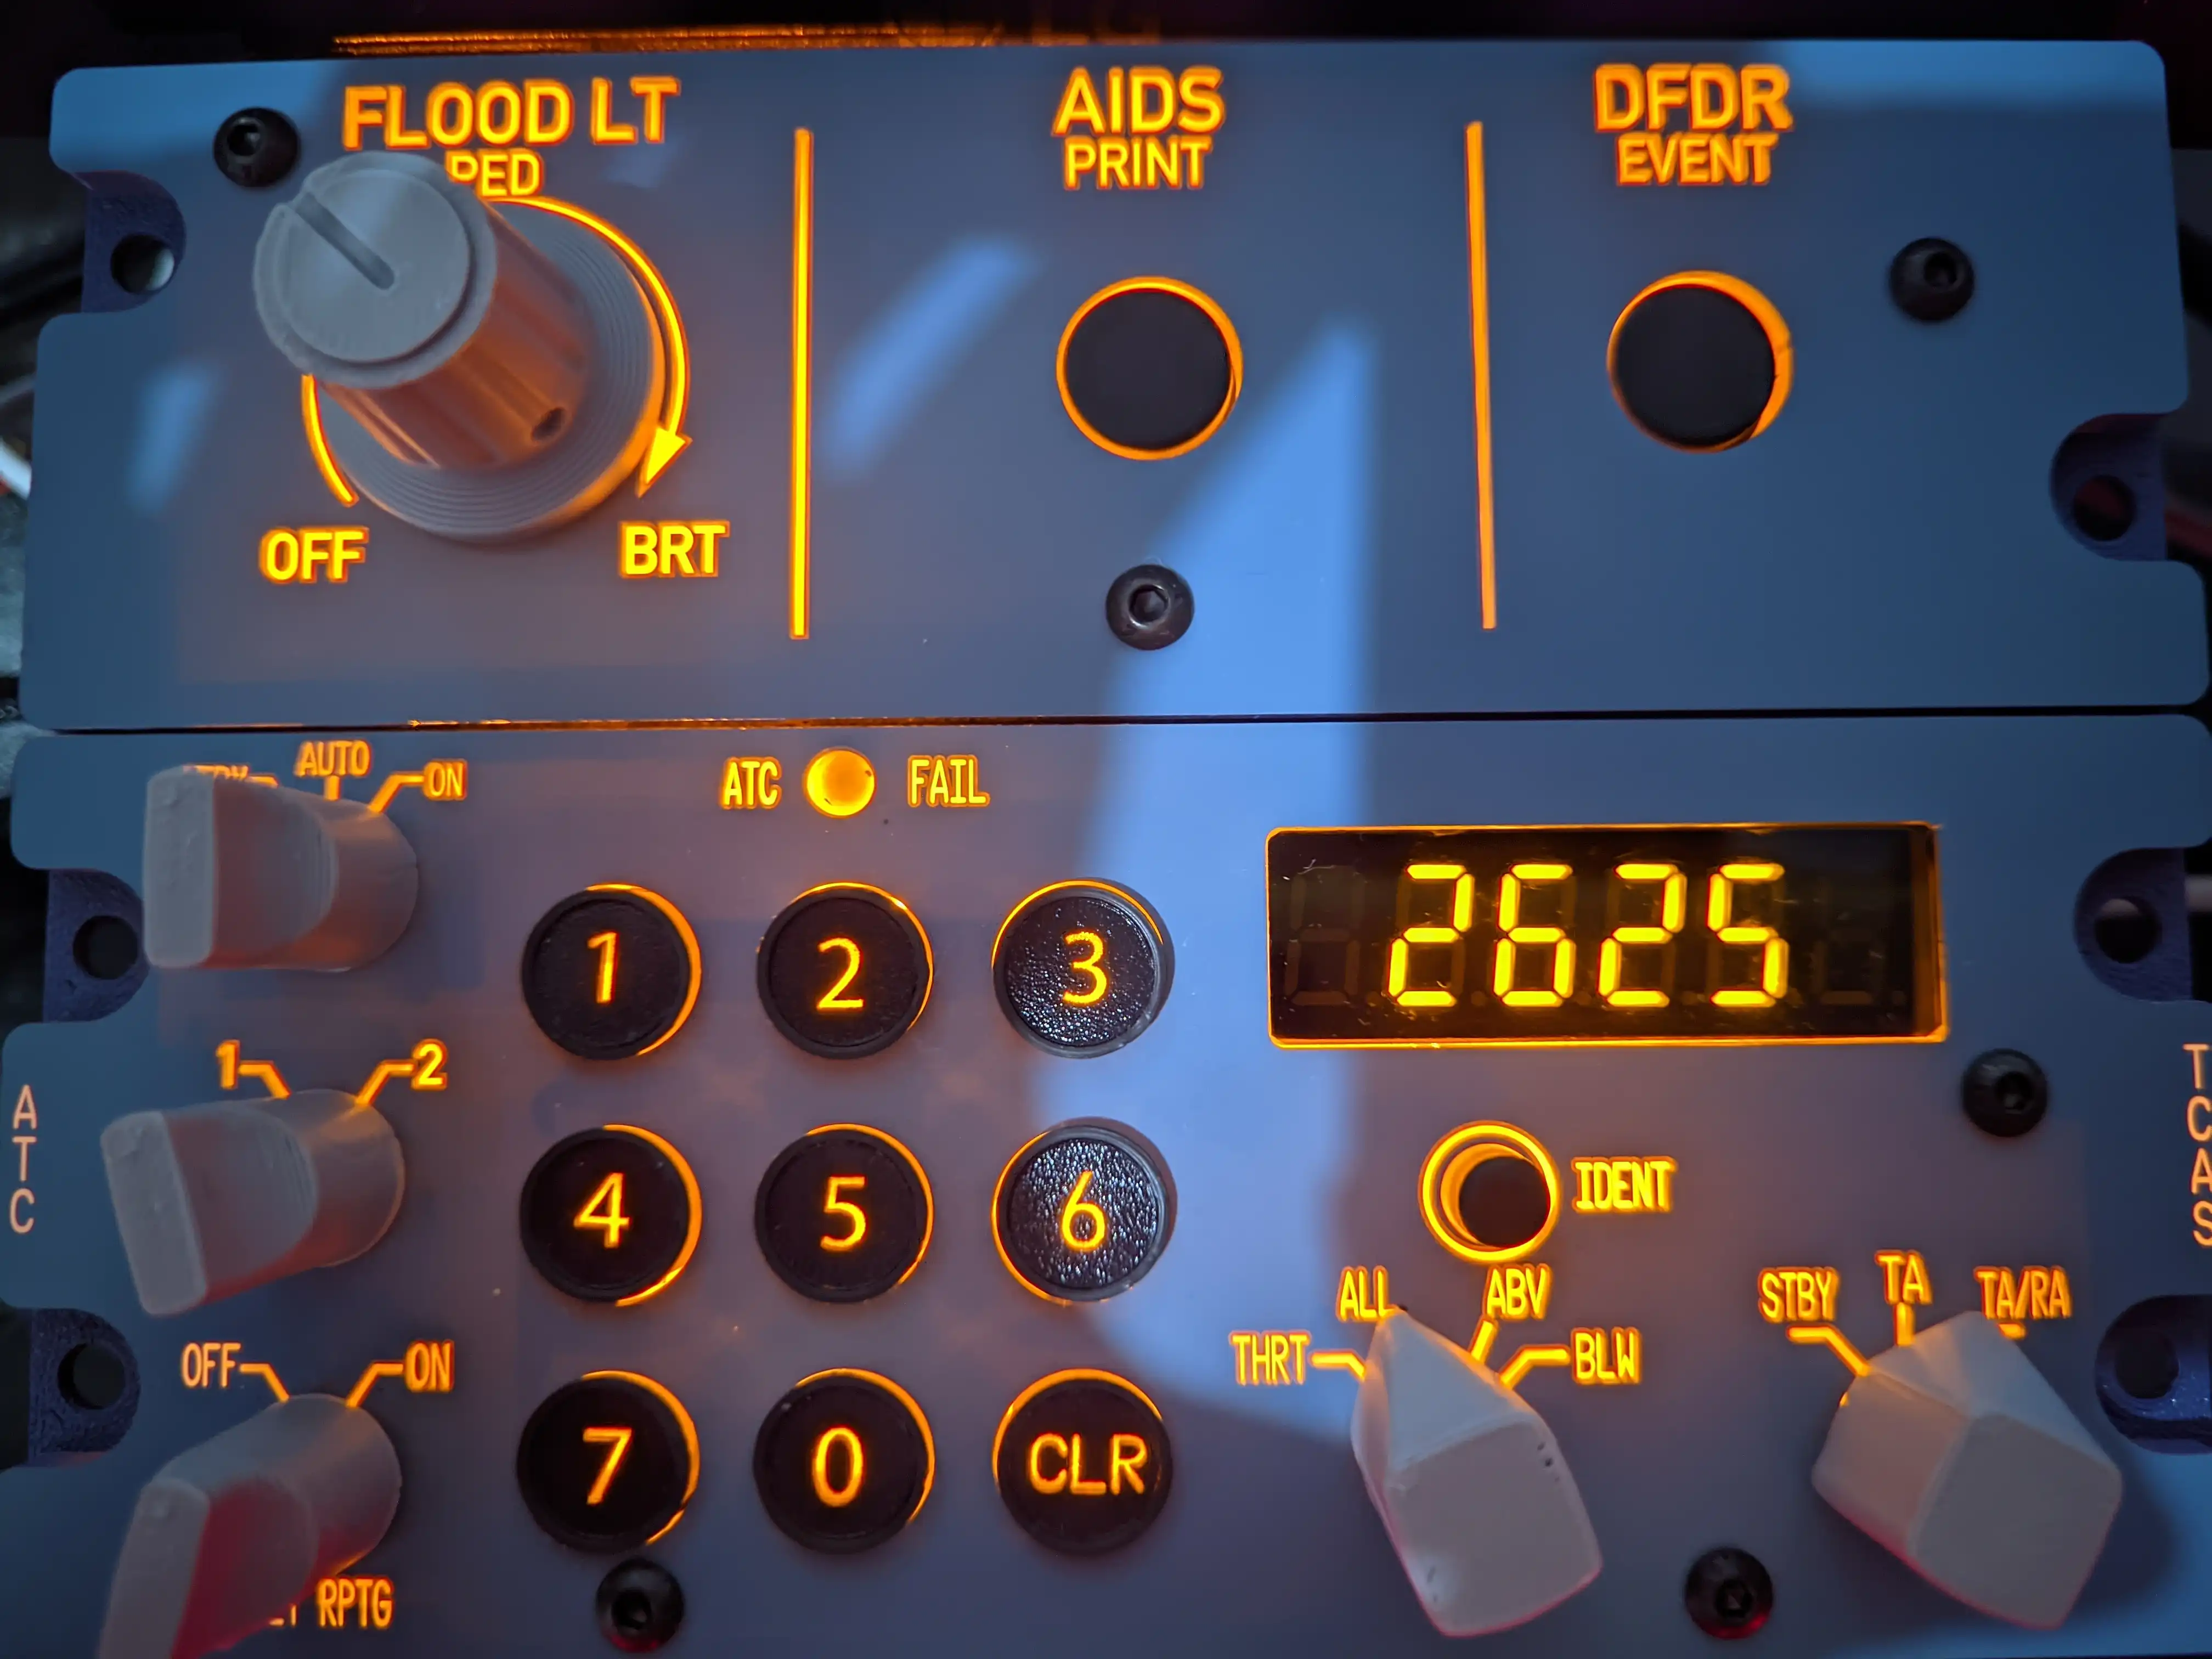
The unboxing experience for the A113V1 (Transponder Unit) was identical, down to the box dimensions. The build quality is just as solid as the A109V3, and the 3D-printed knobs look great, with no excess material or odd defects. The tactile feel of the squawk buttons and the little knobs felt pretty good, just from toying with them before actually plugging the stuff in.

Both units have a very nicely crafted faceplate, with all the necessary holes for installing into a pedestal or whatever other solution you might have in mind for your cockpit that involves screwing it into place. The fonts look pretty close to the real thing upon comparison with reference imagery.
All in all, the first impressions were extremely positive, and I couldn’t wait to get it all plugged into my computer for the maiden flight, a quickie between Auckland and Christchurch, in New Zealand (I wanted to do something unusual for a change since I mostly only fly in Europe).
Initial Setup
Since I had never dealt with specific hardware before, other than the essential ones (flight stick and yoke), MobiFlight was uncharted territory, whereas I already had FSUIPC 7 installed because of my virtual airline addiction. So that meant I only had to install MobiFlight, which Rowsfire had kindly provided alongside an instruction manual and profiles for the Fenix A320.
I must admit it took me a good 15 or 20 minutes to figure MobiFlight out and actually get the profile working, but after that initial hurdle was out of the way, it was pretty much “plug and play” for the most part, not requiring any other effort on my end to get it to work properly with the Fenix upon importing both profiles.
It was quite incredible to start the plane from cold and dark, move the INTEG LIGHT knob on the pedestal (sadly, in-game, since neither of the two is responsible for that in real life), and watch the orange light gradually appear from underneath the text markings on each unit.
Then, of course, I pressed every switch, turned every knob, and was quite baffled by how instant it would always respond (even though I suppose it shouldn’t be that much of a surprise since it uses LVARS that interact directly with the add-on), but I couldn’t help it, since I had never used anything like it before.
It took me all but one flight to understand the appeal of 1:1 hardware like that: it’s unironically so convenient and immersive to physically actuate the switches, especially because that would require moving the camera down (virtually looking toward the pedestal) to hit the take-off configuration button at the holding point, and moving the XPDR switch to TA/RA, and so on, which I can now do without touching the viewpoint at all!
It also does wonders for overall situational awareness when there are bright lights on both CLR left and right on the ECAM SWITCHING panel, which is always within your peripheral vision, so you can easily tab out of MSFS and still be alerted if anything goes haywire with the airplane. Really nice!
Can’t also understate the convenience of having a physical transponder to manually change the squawk code (so satisfying!) and go from standby to auto upon pushback, STBY to TA/RA when lined up on the runway, and so on. It really makes you feel more like a true armchair pilot!
After that first flight, I decided to make my own profile for the FlightSimLabs A321neo, since none were available for the A109V3 or the A113, and that’s when things started getting pretty hardcore.
I really wanted to continue my A21N ops while testing the units, so I had to dig deep into FSL’s official documentation to figure out some LVARS and ROTOR BRAKE codes to get things working as straightforwardly as they do with the Fenix.
I had no idea where to even begin at first as far as initial presets go, but a friend pointed me toward MobiFlight’s own solution for community-made profiles where I found a partial preset for the ECAM panel (made for another company’s ECAM), but at least it’d allow me to check with LVAR they used for each button and what is the logic behind it, and then using guesswork to fill the gaps for the knobs that were not available.
Since I did not want to rebind everything, I used the Fenix profile as a baseline and replaced each function with an FSL-compatible LVAR or ROTOR BRAKE code, gradually testing them in-game one by one to ensure they worked as intended (took me an entire morning).
After a lot of trial and error, I had a partially functioning ECAM SWITCHING, where all the important buttons worked, except for the brightness knobs and the switching knobs (att hdg norm, air data norm, etc.), which were far from essential anyway, so I just didn’t bother and took it for another flight just to make sure the things I had configured were working fine. Indeed they were!
It wasn’t until FSLabs helped me that I could set up the switching knobs properly, since the logic for switching from CAPT to NORM or FO to NORM was different from that in most other ECAM solutions. It turned out I had to create a logic that, on release, would assume it was at norm rather than F/O or CAPTAIN, since the norm position wouldn’t create a unique input for whatever reason (either the same as F/O or the same as CAPTAIN).
After that hurdle was out of the way, it was time to face the hardest challenge yet: the transponder. There was no preset at all for the FSLabs, so I had to look up all the LVARS myself and play with the press/release logic a lot to get it to work as intended (it was particularly hard with the STBY-TA-TA/RA switch).
The only thing that I couldn’t figure out how to do properly was the squawk display, and once again had to get in touch with FSLabs to at least get a North on how to get that functioning. It turns out I wasn’t too far off, and only had to restart MobiFlight (facepalm). If it weren’t for them, I’d probably be stuck still, trying a thousand different things without even considering that perhaps MobiFlight could do with a little restart.
After two long mornings of trial and error, I finally had a 95% functioning profile for the FSLabs, allowing me to use all the important stuff through the flights and gather enough experience to judge whether both units are worth buying. I was very satisfied to see it all working near-flawlessly after so much work and pestering (sorry, Dunc!).
Conclusion
For $249.99 (A109V3) and $169.99 (A113V1), the pricing bracket is quite hard to beat in the 1:1 segment. While there are cheaper units from other brands, they generally compromise on a thing or two, like only having the lower part of the ECAM panel, or combining multiple functions into one, like the radio stack and transponder. As far as 1:1-scale stuff goes, the pricing is very competitive, allowing people to build their own highly modular home cockpits without having to sell a kidney in the process.
The build quality is consistent on both models, feeling sturdy and responsive to the touch. Despite being made of aluminium and plastic rather than metal (which would significantly increase the total price), it does not feel cheap, and the buttons and knobs are quite satisfying to operate. The units look pretty close to the real thing, aside from the LCD on the transponder, which misses the little bezel present on the real unit, but that’s not really a big deal at the end of the day.
The backlighting is pretty good and synchronizes with the airplane’s INTEG lighting (as long as it’s compatible with the plane, of course). I couldn’t figure out how to make it work with foreign profiles like the one I made for the FSLabs, but everything else worked just fine.
At the moment, the only out-of-the-box compatibility is with the Fenix A319/20/21 and the FlyByWire A320neo, but it is possible to make it compatible with other MSFS 2020/2024 aircraft as long as you have access to the add-ons LVARS and a reasonable understanding of how MobiFlight works. They plan to natively support more aircraft in the future (including Toliss and iniBuilds) and transition from MobiFlight to their own solution.
Like I mentioned earlier, I had no idea of what to expect and how i’d integrate it into my flight simming setup, but it didn’t take long at all to realize why it is so cool to have these 1:1 panels, with the transponder being basically a life changer (i no longer have to switch the camera to the pedestal to move the knob to TA/RA before lining up!). It greatly reduces the extra workload of constantly switching camera angles to click stuff.
It is crazy to think we now have somewhat affordable panels, whereas they used to be more than $500 a pop not too long ago, with similar (sometimes inferior) build quality and a multitude of quirks (and you even needed a hardware license for some add-on aircraft. Who remembers that?).
All in all, whether you are a seasoned cockpit builder or just somebody looking for that extra tack of immersion, Rowsfire’s offerings are very solid for the price and quite future-proof thanks to their reliance on MobiFlight - an open source project -, warranting its continued support for years to come, even if a new platform shows up along the way (assuming the MobiFlight project lives on, of course).
A huge thank you to Rowsfire for providing us with the review units!
Share this page


COMMENT ADVISORY:
Threshold encourages informed discussion and debate - though this can only happen if all commenters remain civil when voicing their opinions.