Threshold Review: Rowsfire A107 MAX Overhead Panel V3
November 19, 2025
Rowsfire is a name you may have heard recently. Although the company was relatively unknown just a few months ago, it gained significant popularity with the release of the Rowsfire A107 MAX Overhead Panel. This product is designed to resemble the overhead panel of an Airbus A320 and is competitively priced compared to other options on the market. Initially, the panel had some shortcomings, but Rowsfire actively listened to user feedback and made continuous improvements. Now in its third version (V3), the panel has benefited from the valuable insights provided by previous users. With its affordable price, it could be the ideal choice for anyone looking to invest in a new peripheral without overspending.
First Impressions
I initially received the V2 version of the Rowsfire A107 MAX Overhead Panel and used it for a couple of months. I liked the panel a lot, but it had some quirks that I wish had been addressed. Since then, the team has worked hard to improve the panel, resulting in the development of the V3 version, which I was fortunate to receive.
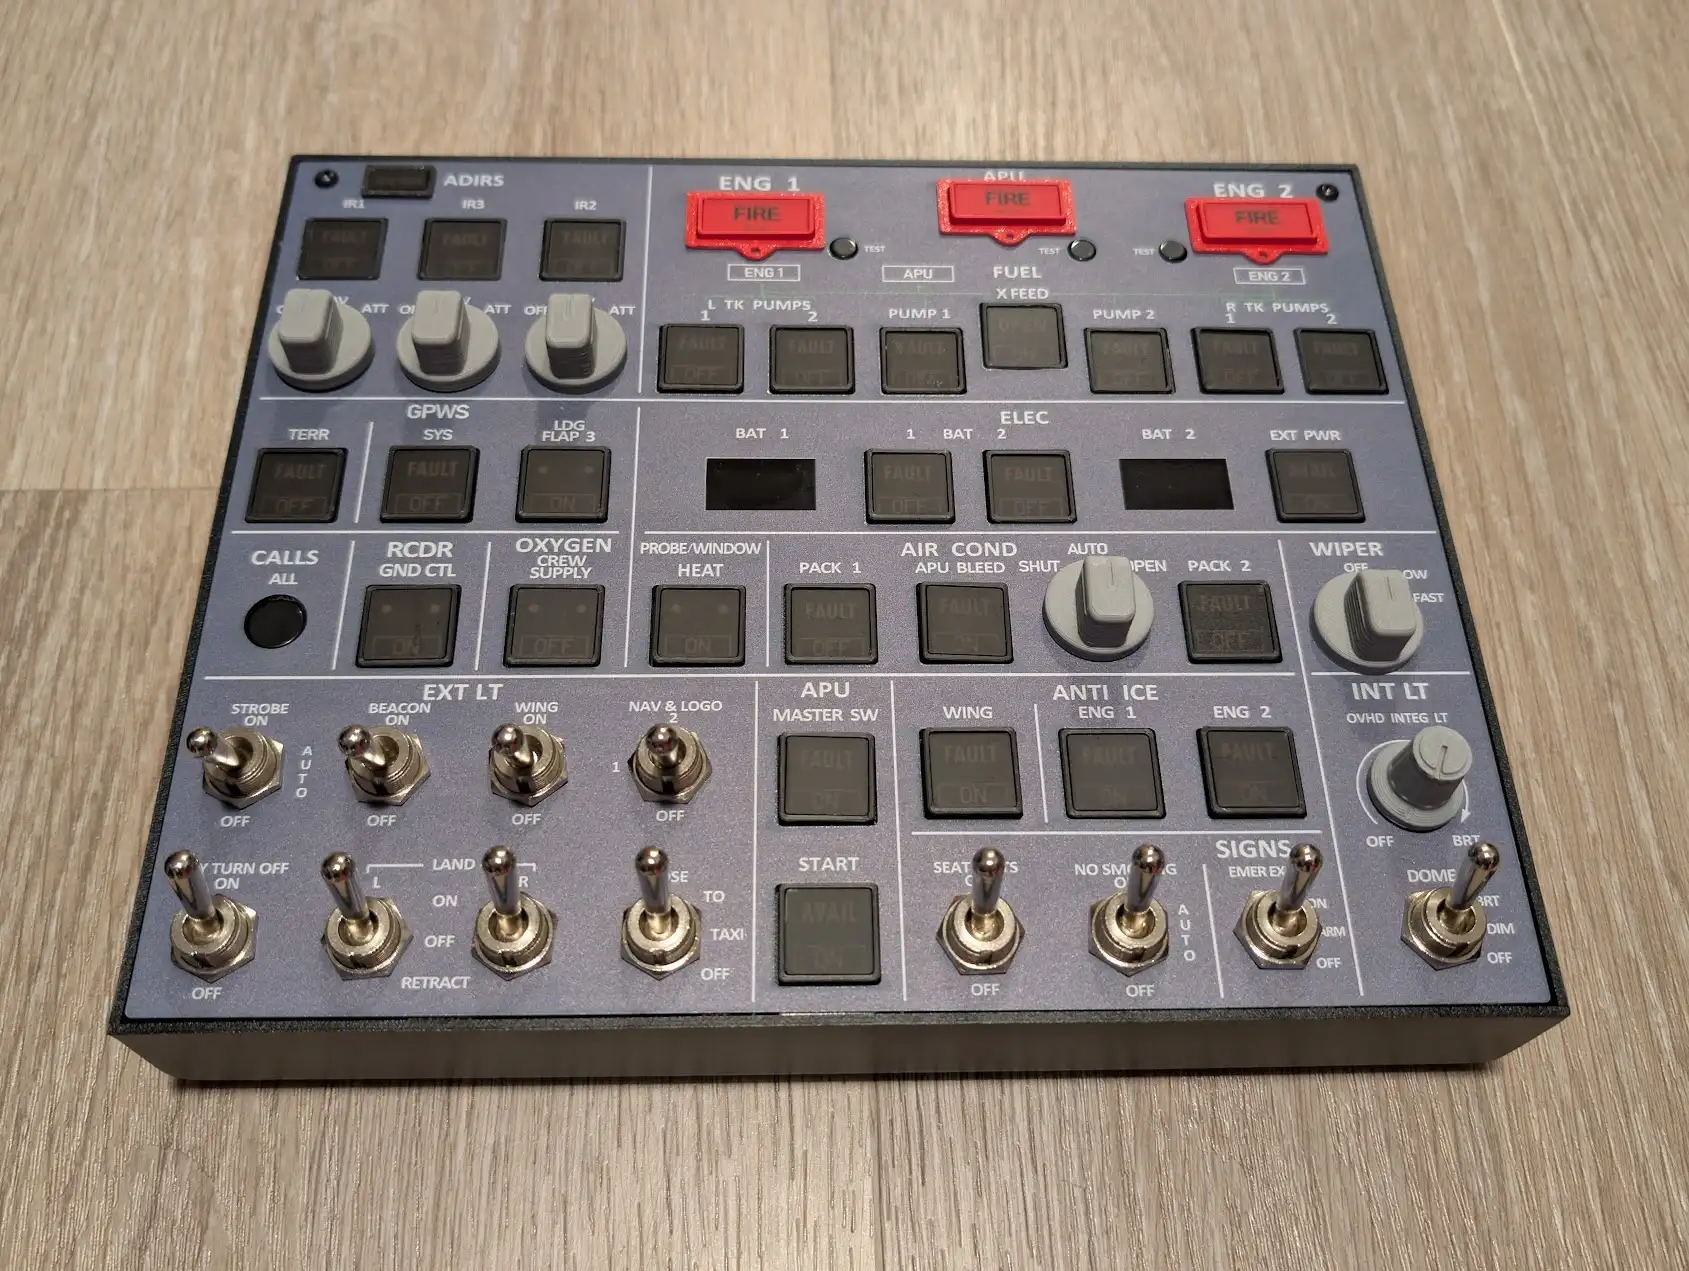
Upon opening the V3 version, I immediately noticed the new design of the buttons and switches. They have a much better feel, creating a promising first impression.

Unboxing
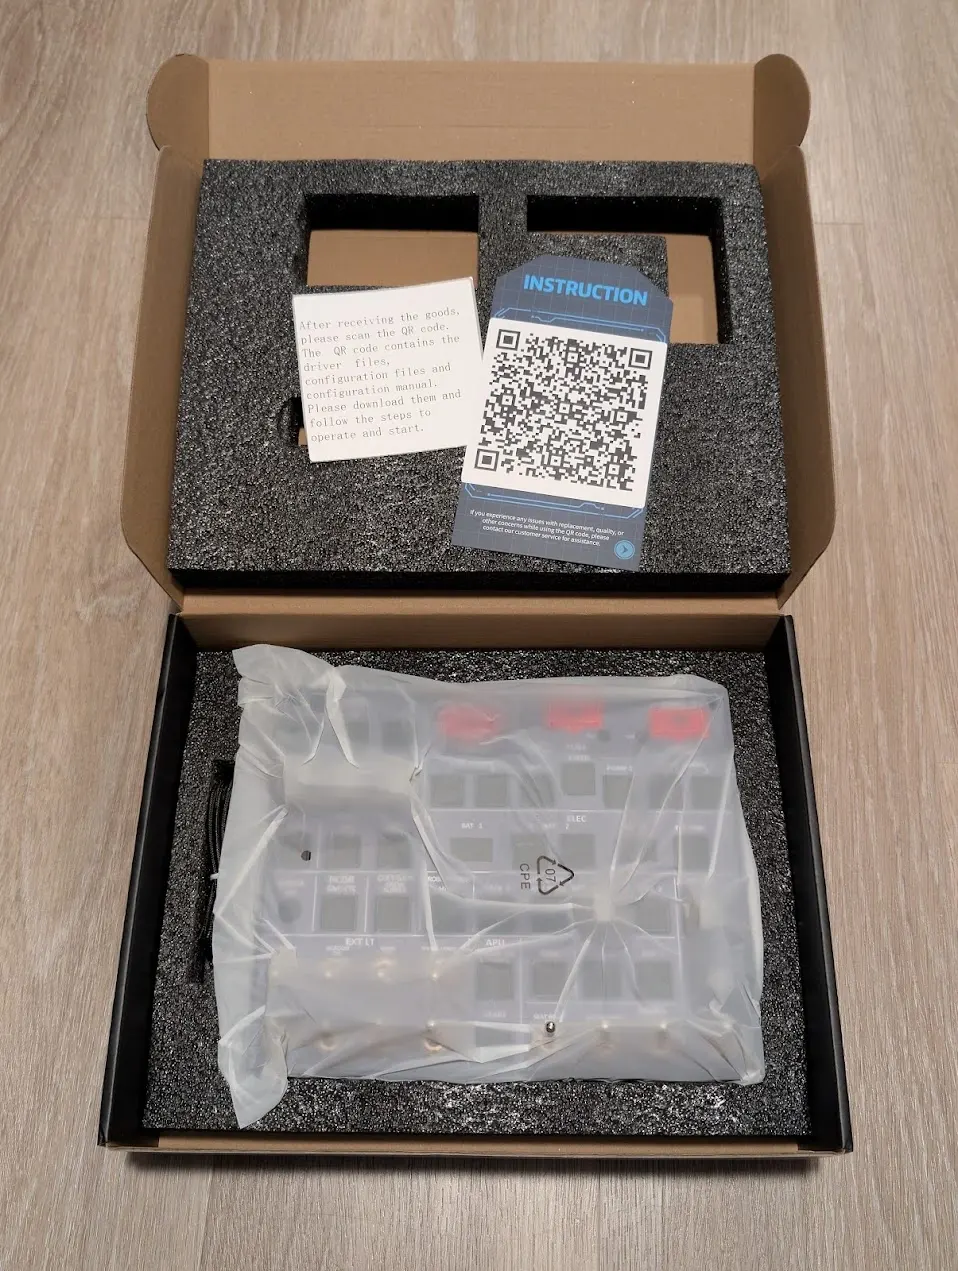
Upon opening the box, you will find an After-Sales Service Reminder Card. This card prompts users to check for any damage that may have occurred during transport; if anything is amiss, the support team is available to assist you promptly. Fortunately, my unit arrived undamaged, thanks to the excellent way it was secured in memory foam inside the cardboard box. Along with the panel, there is a USB-C to USB-A cable for connecting the unit to your PC. Additionally, two small pamphlets are included to guide you through the panel’s setup. It’s great to see that the box does not contain unnecessary extras.
Setup / Software
The paper pamphlets included a QR code for setup, but unfortunately, it didn’t work. However, I noticed that the team is aware of this issue and is working on a fix. Since I had previously tried the V2 version, I knew that a detailed user guide was available on Rowsfire's website. Although the setup isn't as simple as plug-and-play, the comprehensive guide makes it straightforward to follow the instructions step by step.
The setup process consists of installing the MobiFlight Connector, installing FSUIPC7, downloading a configuration file, and configuring the device in the MobiFlight Connector. While the initial setup may be a bit tricky, it should become much easier afterwards. If you encounter any problems during the setup, there is a helpful Facebook group where the team and other users can assist you, or you can contact the team directly through their website.
It’s worth noting that the team is currently developing their own software to simplify the setup process. With the new software, you will only need to open it, select your panel model, and click “run.” This improvement will be beneficial, as it will eliminate the current setup, which can be a hassle for first-time users.

Mounting
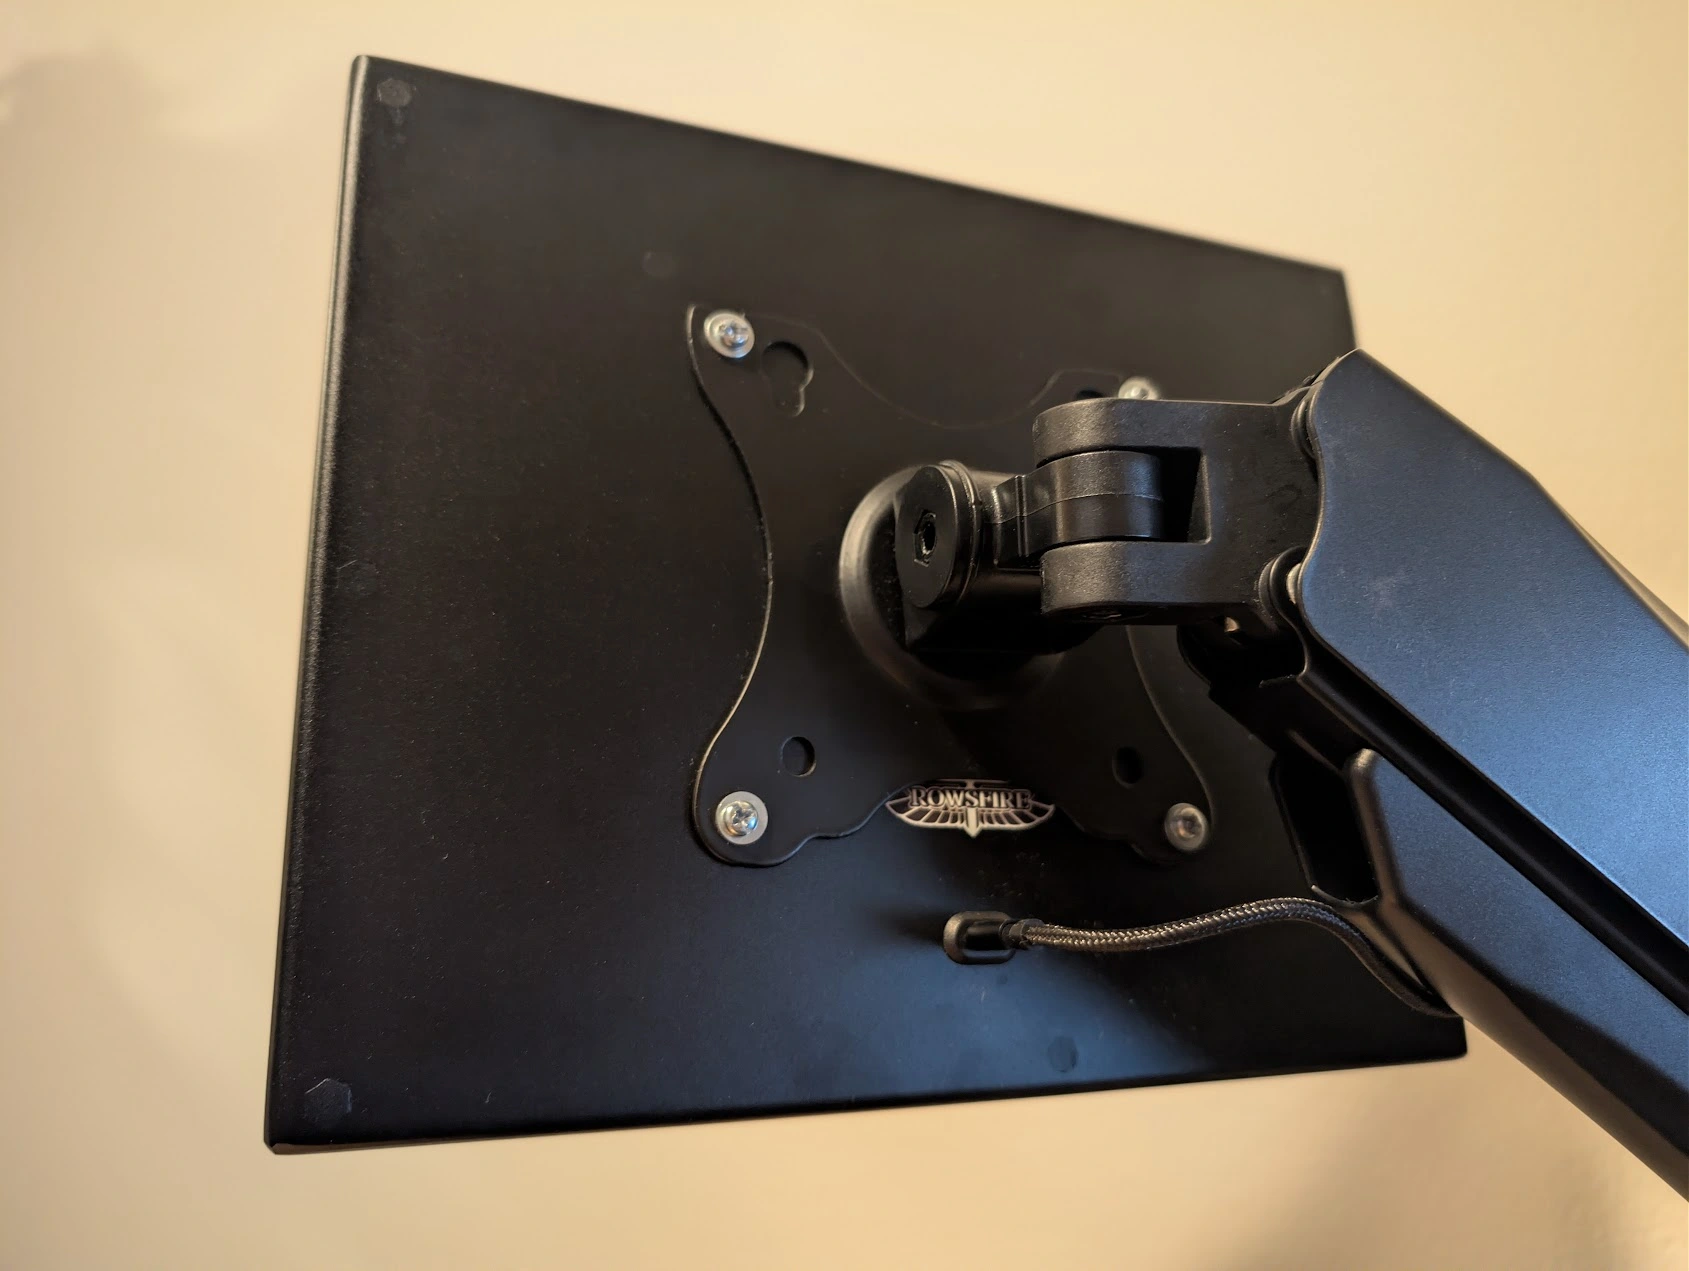
The overhead panel features 100x100 mm VESA mounting holes, making it perfect for mounting above or beside your monitor, or in any other preferred location. Although I bought a monitor arm that is too short to raise the panel above my main monitor, it hangs nicely next to it, freeing up valuable desk space. Keeping the panel off the desk is convenient, and since it weighs only 1000 grams, most monitor arms should be suitable for mounting it.
If you prefer to place the panel on your desk instead, a laptop stand can be used. Just make sure the stand does not obstruct the USB-C port located at the back of the panel.
Build Quality
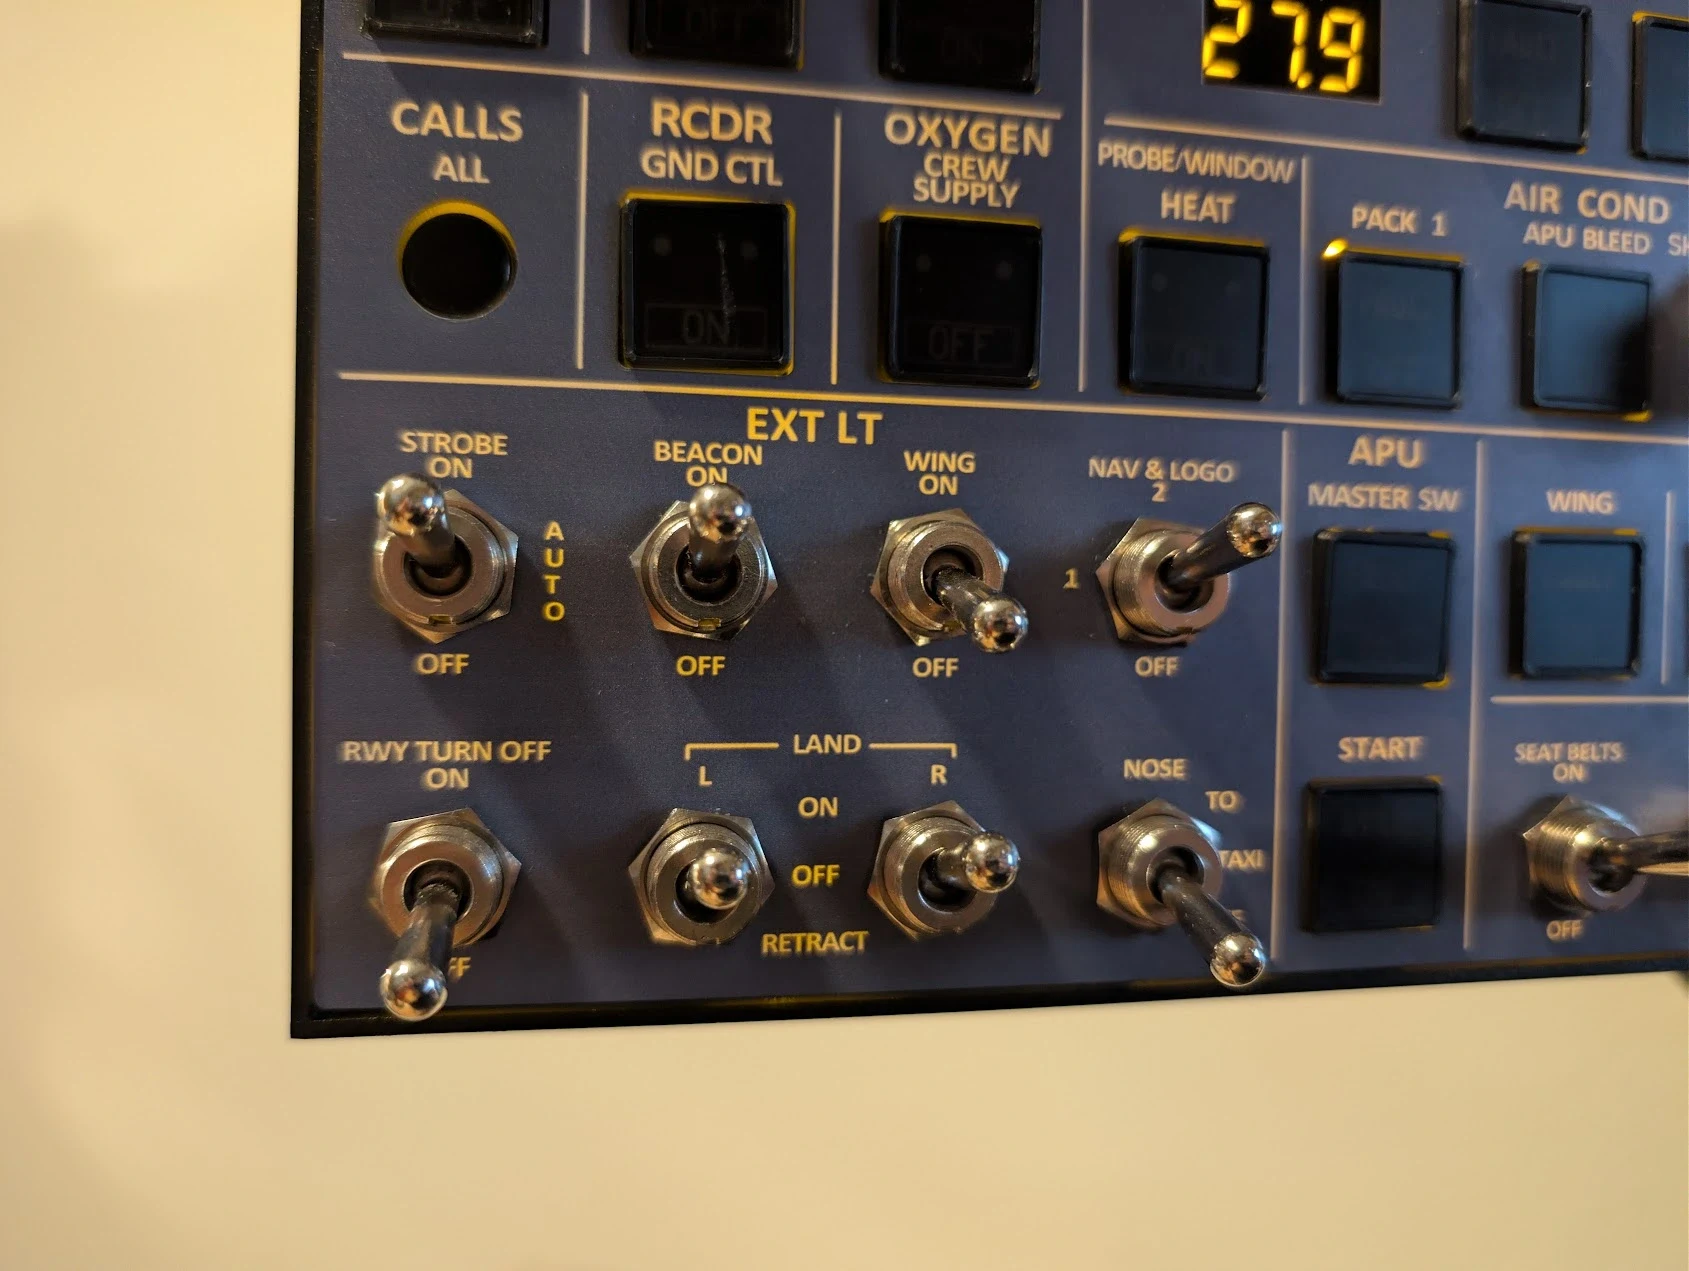
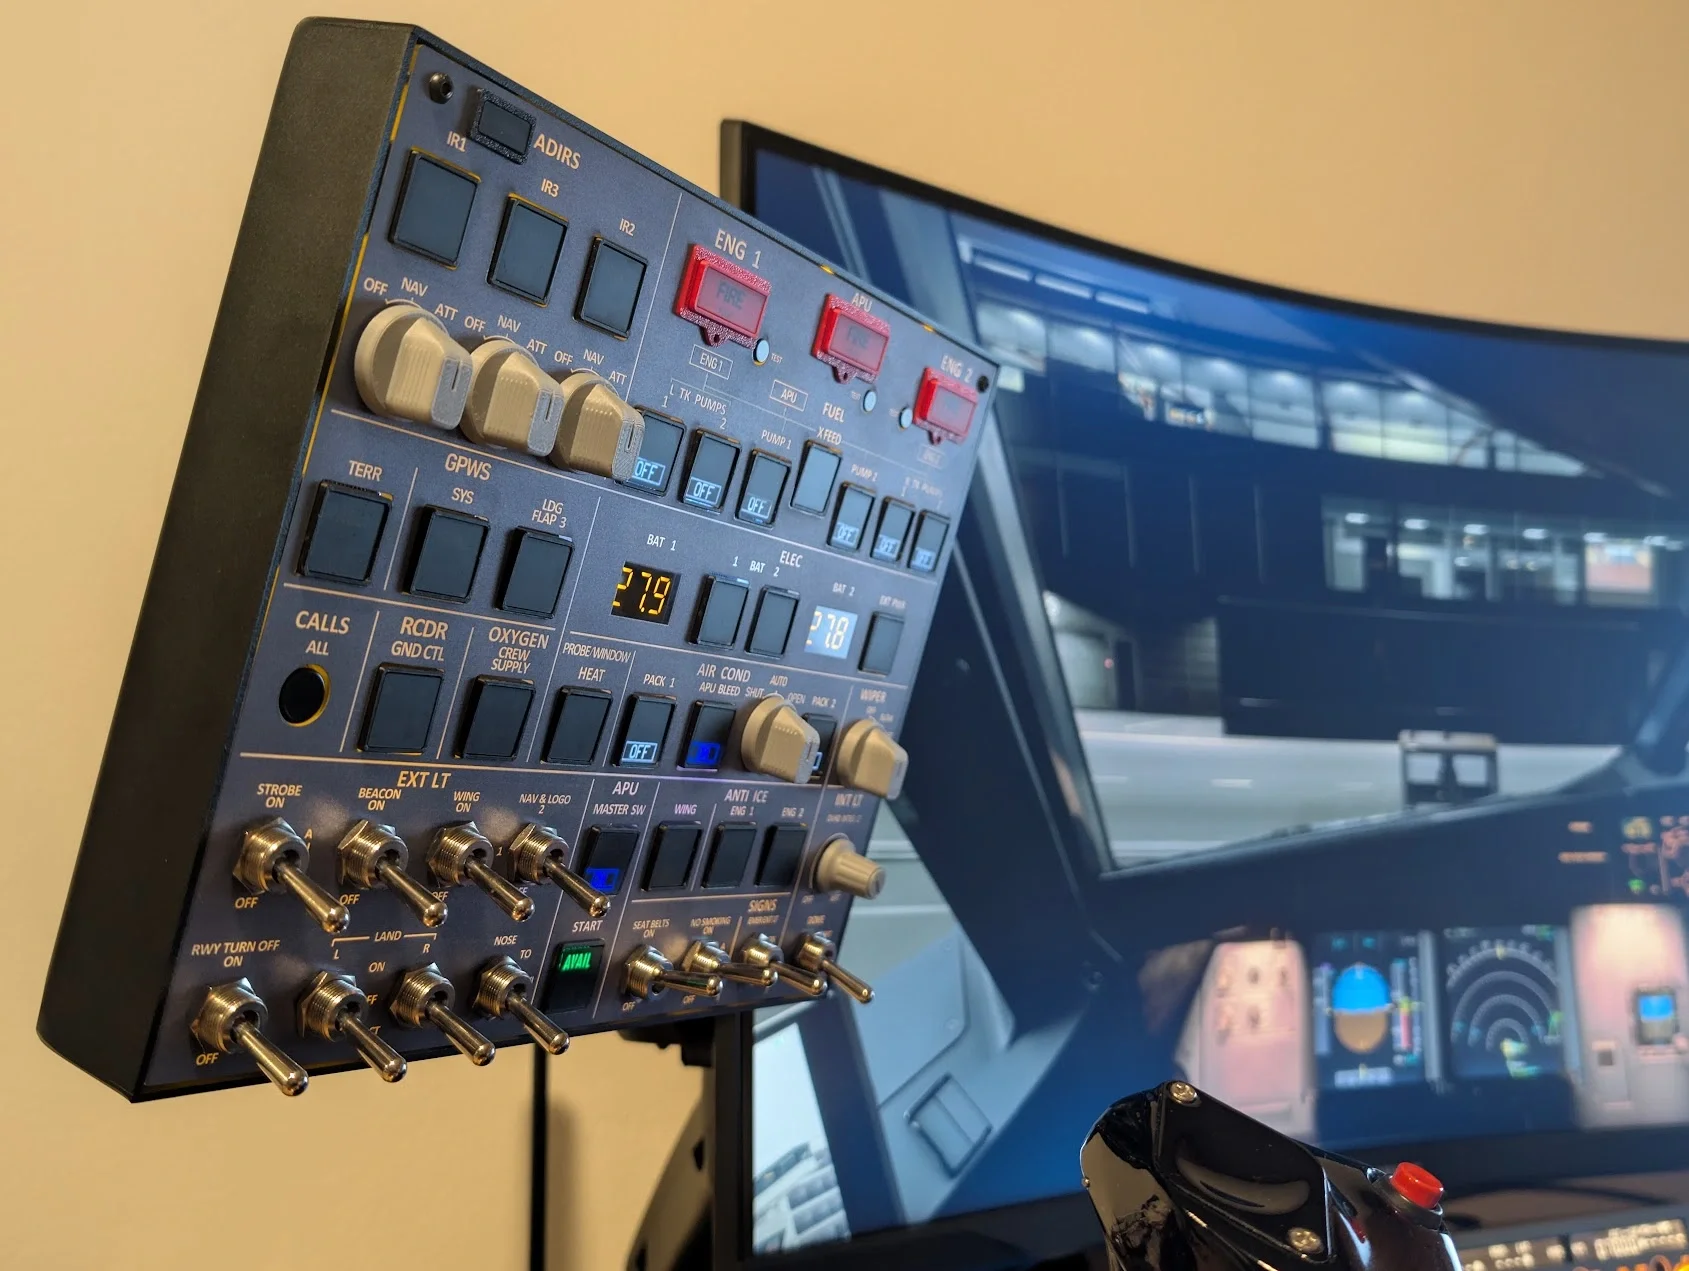
The housing around the overhead panel is made from aluminium alloy, giving it a solid and premium feel. The front panel consists of acrylic, which, despite being secured by only two screws at the top, exhibits minimal flex—an improvement compared to the previous V2 version. All light and signage switches are firm and well-built, and the three-way switches distinctly indicate their different positions.
When using the Wiper, X BLEED, and IRS knobs, the tactile response is impressive. However, it is noticeable that the knobs are clearly 3D printed due to their visible layered surface. This observation also applies to the OVHD INTEG LT knob. While this doesn’t affect functionality, it is apparent upon close inspection. A nice detail is that all the switches have small ridges on the side, similar to their real-life counterparts.
Regarding general switches, such as the APU, Fuel, and Battery switches: in the V2 version, these switches were quite wobbly, both when pressed and in their default position, often failing to lock properly after being activated. In the V3 version, I’m pleased to report that the team has introduced a new type of switch that requires a bit more force and locks and unlocks reliably. Although they may still feel slightly wobbly, this is a significant improvement over the previous version.
The fire switches in the earlier version had a similar issue, but they have now been reduced in size, greatly enhancing their stability. One change I am less enthusiastic about is that the OVHD INTEG LT is slightly dimmer than in the previous version, to the point of being somewhat too dim for my preference. However, an improvement compared to the earlier version is that the lighting now syncs with the aircraft in the simulator, whereas the previous version only had an on/off switch for the panel itself, not for the simulator.

Room for Improvement
Nothing is perfect, and there is always room for improvement. If I had to nitpick, there are a couple of minor aspects I would love to see enhanced in future versions. As previously mentioned, the Wiper, X BLEED, IRS, and OVHD INTEG LT knobs clearly exhibit the layers from the 3D printing process. While I understand that moulding these knobs could significantly increase the price due to the high costs involved, it is worth noting that they do have a visibly 3D-printed appearance.
In the previous V2 version of the panel, the Strobe, Beacon, NAV & Logo, and Landing Lights featured distinctive Airbus-style light covers that made them unique. Although these were only attachable and detachable 3D-printed covers, I appreciated them a lot because they resembled the real thing. Unfortunately, the new V3 version does not include these covers, nor are any available for purchase. While this change does not affect the panel's functionality, I would love to see the covers return.
Aside from this, I do not have any major issues or shortcomings with the panel. Given its lower price point compared to similar products on the market, some compromises are expected, but these points are still worth noting.
Community
Before I received any panels, I accidentally discovered the Rowsfire official group on Facebook. I decided to join since the company was new to me, and I wanted to learn more about their work. Not only did I gain insight into the company, but I also found a vibrant community. Group members offered assistance with setup and shared answers to questions from those who had not yet purchased the products.
The Rowsfire team is also active in the group, providing previews, help, and taking notes from users to improve their products. I greatly admire this approach; it's essential for a company to listen to its customers regarding necessary changes. This commitment to customer feedback was particularly evident when they announced the V3 version, which incorporated all the improvements suggested by users of V2.

Closing Thoughts
I have to admit that I genuinely enjoy using the overhead panel in the Fenix Airbus family. Whenever I have the opportunity, I prefer to fly this aircraft to take full advantage of it. There’s something satisfying about physically pressing the buttons. With my miniCockpit miniFCU, miniCockpit miniEFIS, and WinWing MCDU, I don't even need to move my camera around in the simulator—except when I need to adjust the transponder. This overhead panel adds a level of realism that I didn’t realise I needed.
Verdict
The Rowsfire A107 MAX Overhead Panel series has encountered some issues in the past; however, the latest V3 version has made significant improvements and offers a strong feature-to-price ratio. At a price of $379.99, it's hard to find a complete Airbus A320 overhead panel that meets this level of quality. If you're looking to enhance the realism of your home cockpit, this product is definitely worth considering. Given what it offers, the pricing is very competitive.
A big thank you to Rowsfire for providing us with a copy to review!
Share this page


COMMENT ADVISORY:
Threshold encourages informed discussion and debate - though this can only happen if all commenters remain civil when voicing their opinions.