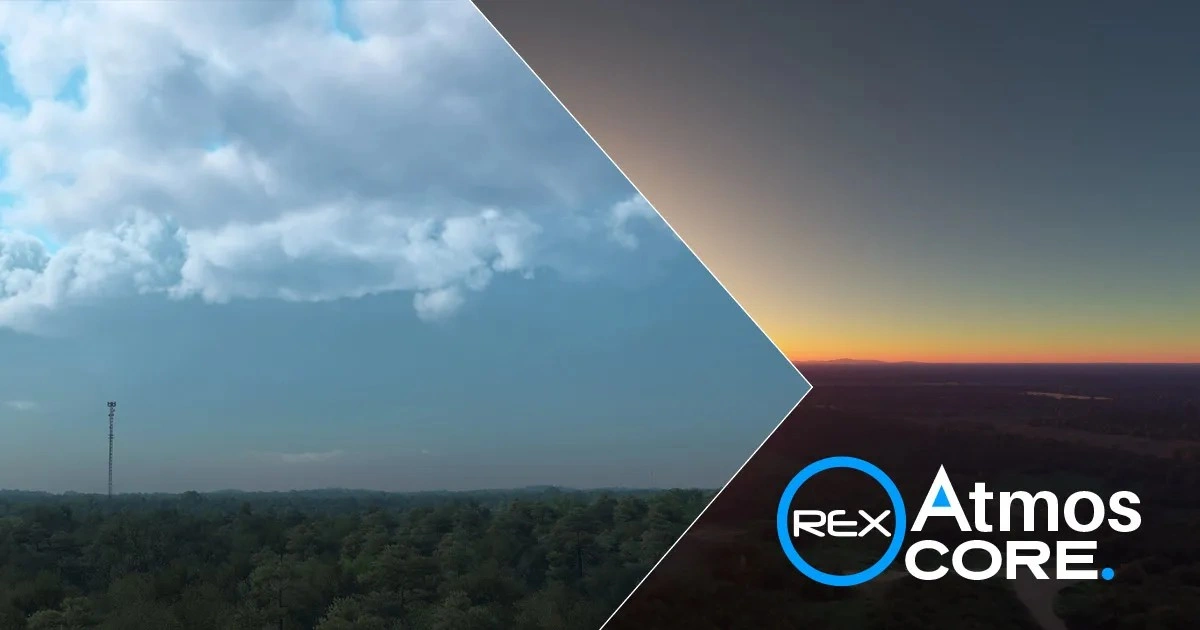
Threshold Review: REX Simulations Atmos CORE for MSFS 2024
October 28, 2025
I recently had the chance to try out Atmos CORE, the latest release from REX Simulations. After first debuting Atmos back in Microsoft Flight Simulator 2020, the team is already back with a fully rebuilt follow-up, now for Microsoft Flight Simulator 2024.
Atmos CORE aims to adress shortcomings in MSFS’s weather and atmospheric depiction, offering greater control and customisability over light, haze, and sky behavior, that the default engine still struggles to fully capture.
I’ve spent some time putting it through its paces, and in this review, we’ll take a look at the installation process, interface, what type of results you can expect, and ultimately, if Atmos CORE is worth trying out!
Who is REX?
A veteran of the flight-sim scene, REX Simulations has shaped virtual weather and visuals since the FS2004 era, earning recognition through products like Environment Force and Sky Force 3D. Today, REX focuses on environment-enhancing add-ons for MSFS, including Weather Force, AccuSeason, Real Global Airport Textures, and now, Atmos.
.webp)
REX Atmos
Atmos is REX’s real-time editor for weather, lighting, and atmospheric behaviour, integrating with Asobo Live Weather and ActiveSky. (I was sadly unable to test compatibility with the latter.)
Atmos allows users to adjust cloud formation, particulate behaviour, and ambient lighting, saving these changes as shareable presets. Claimed benefits include improved Rayleigh scattering, truer cloud colour, smoother atmospheric blending, and more natural lighting.

Installation
Installation of Atmos CORE is quite straightforward. After purchasing, you download the installer, run the Setup Wizard, and follow the on-screen steps to target your MSFS 2024 install. An internet connection is required for installation, registration, and ongoing operation.
Before installation, REX recommends uninstalling any previous versions and removing leftover folders to avoid conflicts. After setup, ensure Atmos CORE is allowed through your firewall and antivirus, and always run it as administrator. A user manual is also included.
This review was conducted on the initial release build 8.0.2025.0812, and later on the experimental SU4 beta build, 8.0.2025.0919.

How Atmos Works
Atmos is not ReShade or Nvidia Freestyle. Post-processing tools sit on top of the rendered image, like taping a coloured filter over a lamp, to change the hue of light coming out. Atmos, instead, goes inside the lamp and swaps the bulb.
Basically, the simulator retains a set of numerical values in memory, that dictate how various aspects of the lighting engine are assembled, and what the visuals look like in the sim at any given point. You’ll find values for Rayleigh scattering, particle absorption, distribution, global illumination, and so on.
Atmos scans for these memory values each session, then writes new numbers to those locations, changing the basic instructions for how MSFS should compute its visuals, which the sim then applies immediately.
In practice, this means changing a value from, say, 0.035, to 0.050, and the MSFS render pipeline immediately uses that new value in its lighting and sky calculations, thickening the horizon, changing the sky colours, or tinting the clouds.
REX emphasises that Atmos Core is non-destructive. It edits values only in memory while running, writes nothing to disk, and makes no permanent changes to MSFS. By either closing the program, or hitting the "Reset" switch, the sim should revert everything back to default.
This Reset function does, however, not always seem to work correctly, sometimes leaving a slightly off lighting state. Therefore, I'd recommend that Atmos is closed fully, before restarting MSFS, to guarantee that everything is reset properly.
Furthermore, Atmos should always be started after the sim has loaded, otherwise you'll break something.
.webp)
Program structure
The application is organised into three modules, Weather, Atmos, and Enviro, each controlling different parts of the simulator’s visual environment.
.webp)
The Weather Page
Weather defines the meteorological scene (wind layers, temperature, pressure, and the shape and stacking of clouds).
When opening the module, you’re first greeted with a Weather Mode Selection screen, where you choose how you want to define the in-sim weather.
There are three main options: Live Weather, METAR Weather, and Custom Weather.
.webp)
Live Weather integrates with whatever weather engine you’re already using, whether that’s Asobo’s default Live Weather or a third-party injector such as ActiveSky. This mode offers moderate control over parameters such as cloud lighting and atmospheric visibility, while leaving core meteorological data untouched.
It’s important to note that Atmos does not replace your weather engine, it simply lets you fine-tune the visual and atmospheric depiction within it.
The main sliders here include Visual Cloud Enhancement, which affects how dense and soft clouds appear, and Cloud Luminance, which can add structure and contrast to cloud layers when carefully tuned.
There are other settings, such as Buoyancy or Minimum Speed, which primarily affect cloud motion, and these should generally be left alone, as overusing them can cause some unrealistic behaviour.
.webp)
Moving on, METAR Weather lets you inject real-world conditions, by the use of real METAR reports. You can either search by ICAO code or paste a valid METAR string manually, then click Inject Weather to load it.
This mode offers complete control over all weather elements, but it isn't live, making it more ideal for specific test-beds, static or comparison scenarios.
.webp)
Custom Weather gives full creative freedom. It’s not tied to real-world data, so you can design complete weather scenarios. Here, you can either load pre-made or community presets or build your own from scratch.
.webp)
This mode provides full control over every adjustable weather component, from layering cloud decks and tuning their density to modifying wind direction, visibility, and humidity.
.webp)
.webp)
Overall, though, there’s little reason to tweak much in the Weather tab, and it can usually just be left alone.
.webp)
The Atmos Page
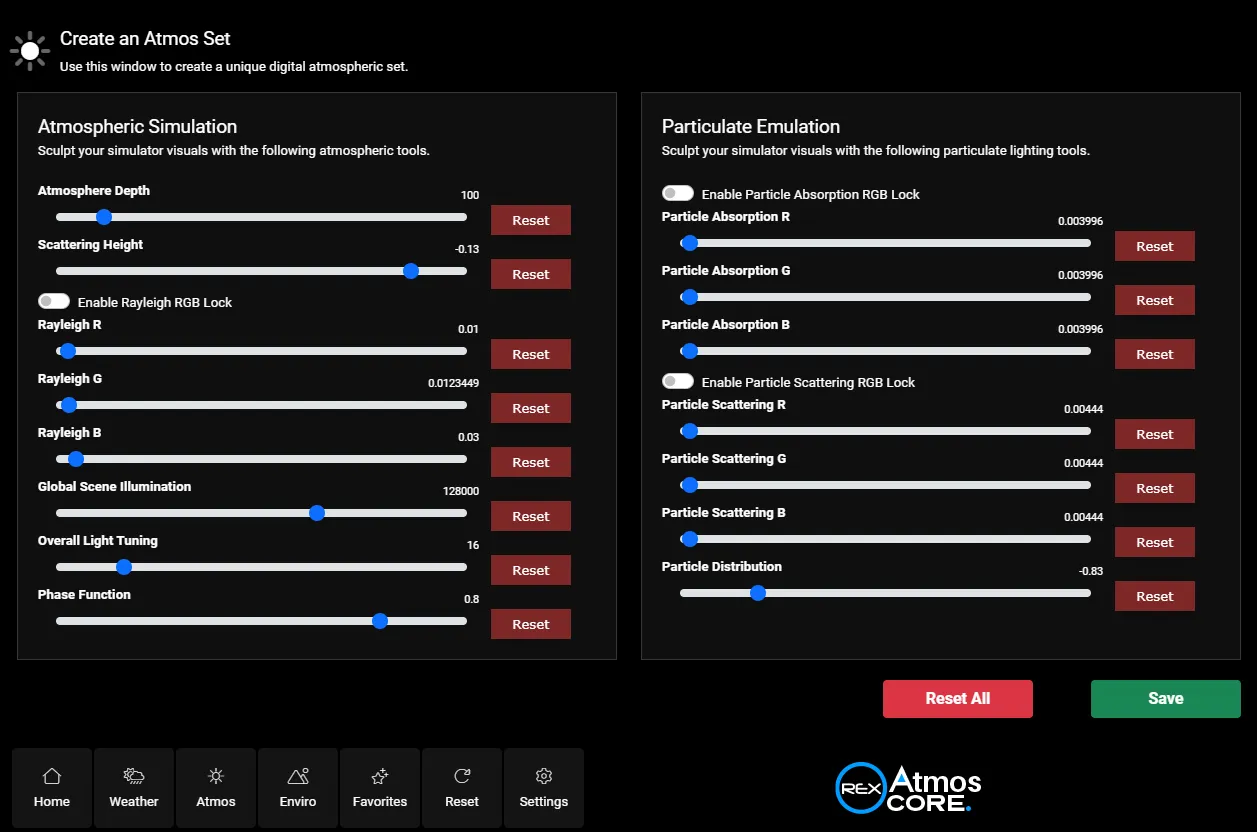
Most of the real work happens in the Atmos editor. While the other pages have their uses, the major visual transformation takes place here, with the controls that govern Rayleigh scattering, particle absorption and distribution, global illumination, tonal balance and so on.
These settings define how the simulator renders air, how light scatters, how colours blend, and how haze develops with distance.
As with the Weather editor, you can create and save your own presets.
.webp)
.webp)
The key sliders here are Particle Absorption, Scattering, and Distribution. These control how far you can see, how thick the haze feels, and how the transition between sky and ground behaves.
Particle Distribution adjusts the haze density in the vertical column: lower values thin the atmosphere and improve visibility, while higher values create a heavier, humid look near the horizon.
Global Illumination affects overall brightness and contrast; keep it close to default to avoid flattening the light. The Rayleigh RGB sliders can fine-tune the sky tone, but definitively need to be used with care.
.webp)
In short, less is more here. Small, careful movements go a long way, and restraint is quite important.
.webp)
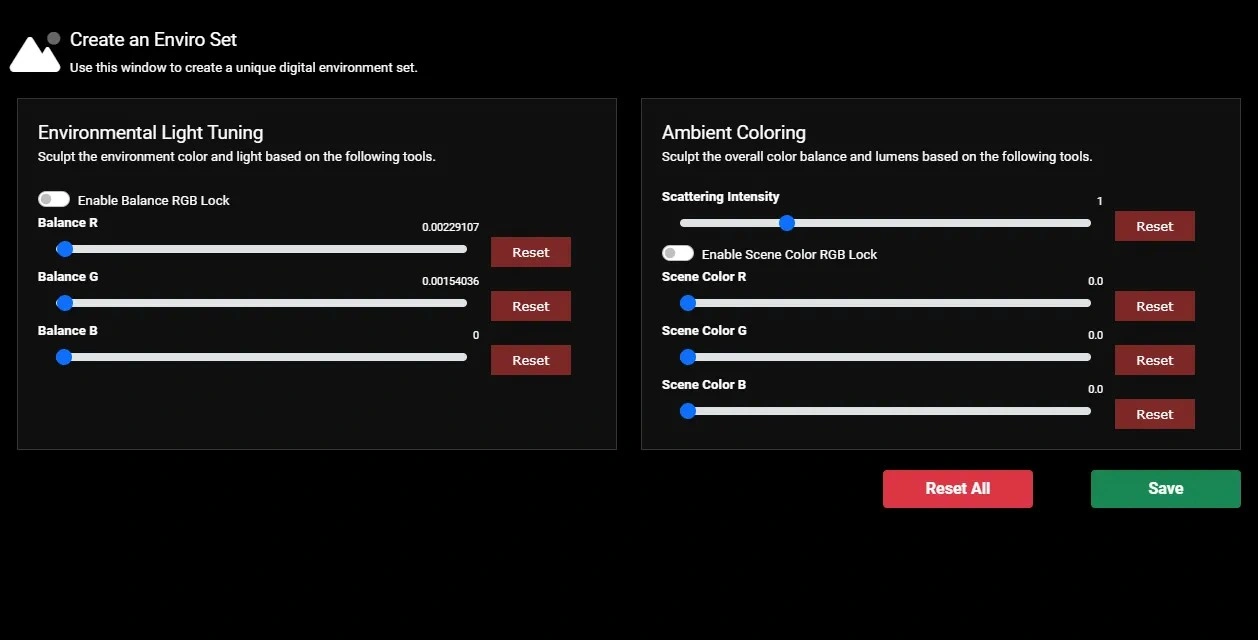
The Enviro Page
The Enviro page fine-tunes the global tone and colour balance of the world. You can, for example, refine colour behaviour further, after you have set scattering and particles, letting you adjust the ambient tint or temperature by tweaking the red, green, and blue channels.
Presets
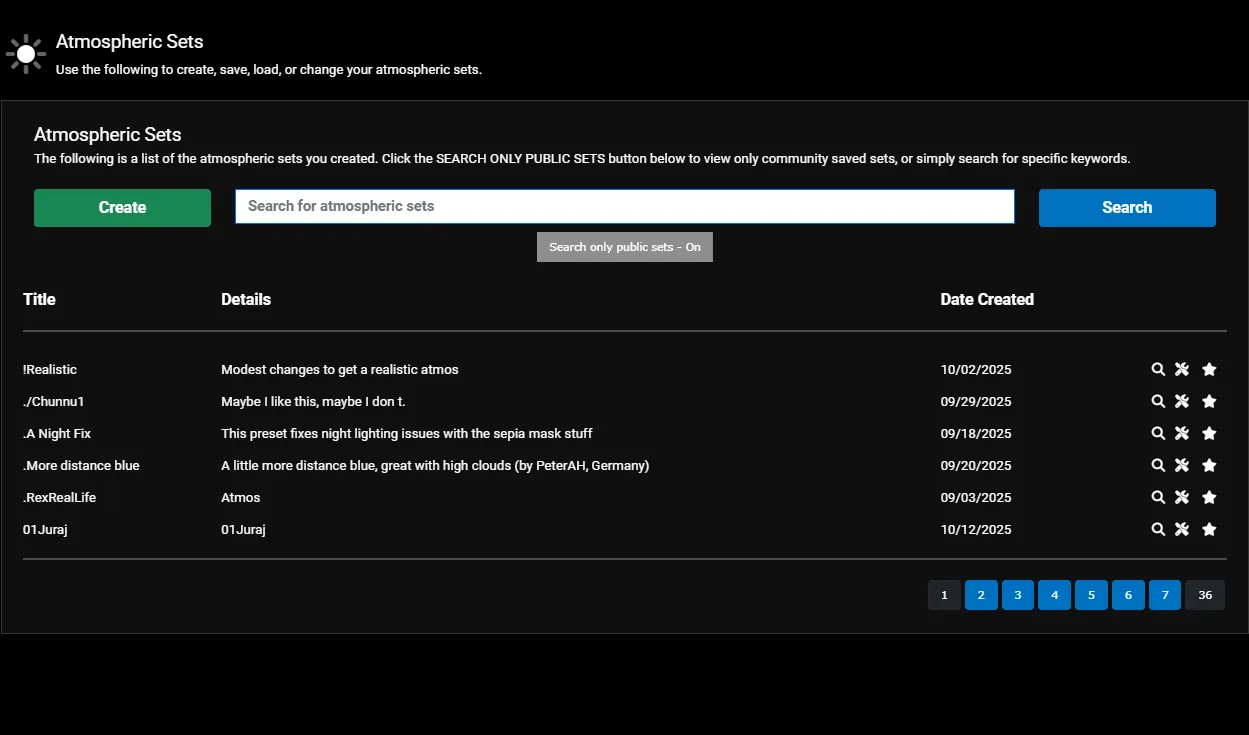
Atmos CORE is preset-driven: every change you make to your sim is saved as a preset that you can apply, favourite, share, and iterate upon.
The app includes a built-in community library where you can browse presets created by other users, test them live in the sim, and save them as favourites.
You can also upload your own creations for others to use.
The favourites area is pretty much read-only: meaning you cannot really edit things, once you favourite them. You can tweak a favourited preset during a session, but those edits are not retained across restarts, and you cannot save a new version from that view.
To create your own version of a downloaded preset, you first have to open the preset in the editor, make your changes, save it as your own copy, and then mark that saved version as a favourite; if you download straight to favourites without first saving to your library, you will not be able to modify it afterwards.
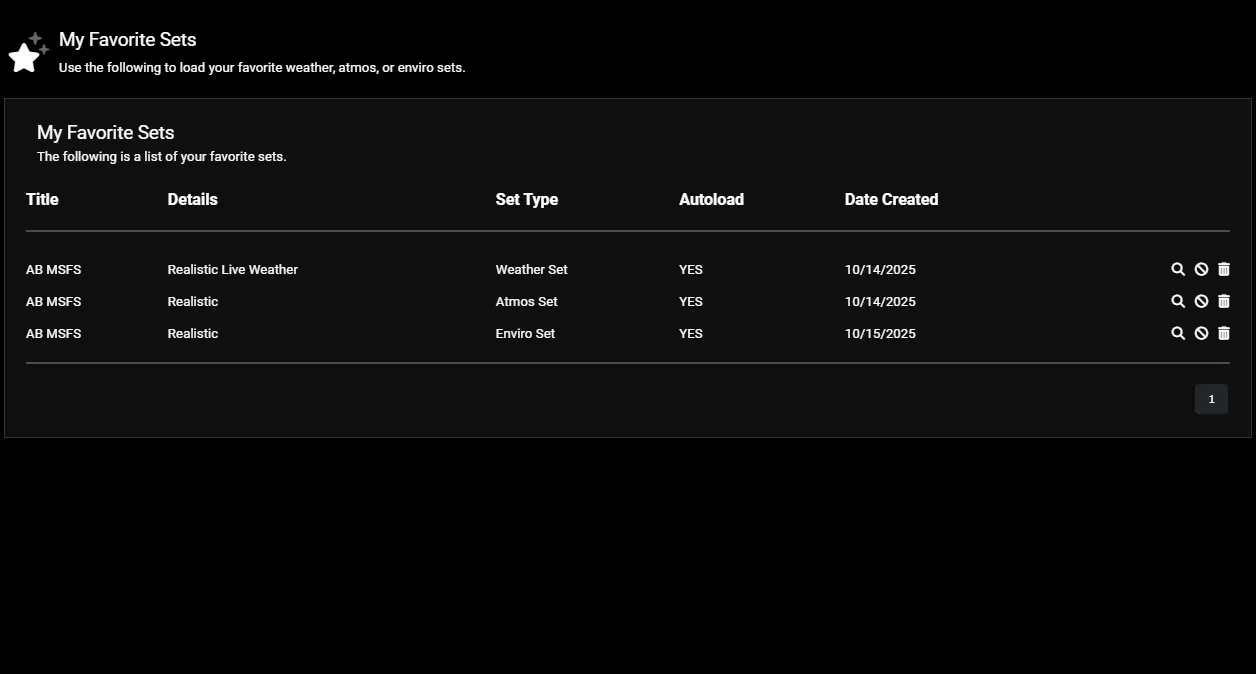
For Weather, Atmos, and Enviro, you can set one preset — either your own or downloaded — to autoload at startup, and the three can be used independently or together.
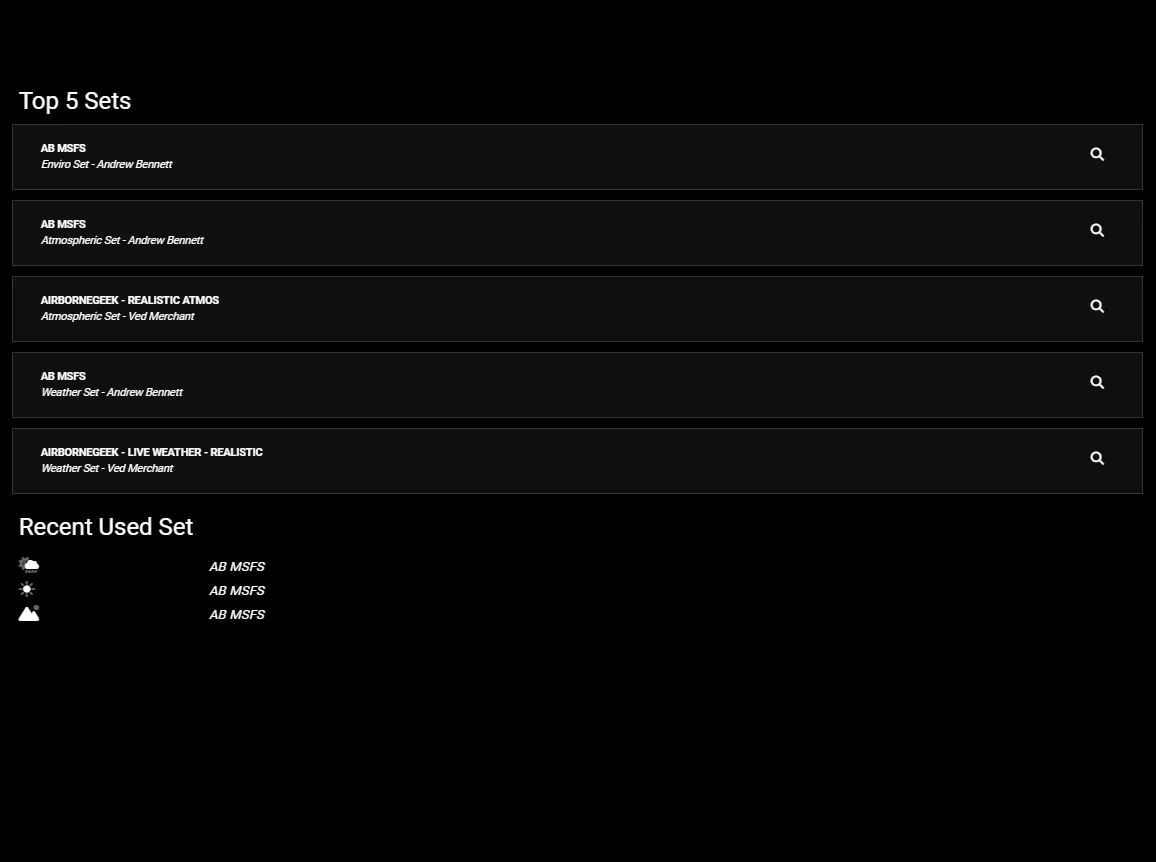
There is also a rotating Top 5 list to help you decide which user-created presets to try. I did notice, however, that this list does not display the actual latest version of these presets, so don’t download them from the Top 5 list.
If you actually want to download a Top 5 preset, you’ll need to search for it manually, which can get annoying over time.
The community library is definitively a great thing to have, and makes Atmos accessible for all. With the library, you can, essentially, let others do the hard work of creating presets, then download a profile that suits your taste.
User Interface
Now, as for the less positive side of things, we have to talk about the User Interface.
The program relies entirely on sliders for adjustments, and you're somewhat forced to work with cumbersome, non-linear controls that lack precision, making fine-tuning especially frustrating.
For newcomers, many of these functions present a steep learning curve, and some sliders are not necessarily intuitive.
The bigger issue is granularity. Most sliders cover an unnecessarily wide range, yet the functional, realistic area you will most likely use sits tightly in the middle. The extremes are theatrical, and rarely helpful if you’re aiming for realistic results, while the remaining 80–90% of the slider is essentially useless.
As the simulator is sensitive to coefficient changes, even a tiny slider movement can dramatically alter the image, yet the sliders move in increments that are far too large, skipping over many numerical values that would be useful.
This lack of precision is annoying at best and means that even if you know what you are looking for, some results may still be impossible to recreate, as the slider system simply does not allow you to use the desired values.
Imagine a setting where the number 2 gives off a green tint, 5 produces a red hue, and 8 a blue one, yet the slider governing this range stretches from -1000 to +1000. Even the tiniest of mouse movement can jump from 0 straight to 20 or –15, completely skipping over the numbers you actually need.
It’s like trying to thread the needle while wearing boxing gloves; the precision just isn’t there, and you’ll probably end up jabbing around until something sort of works, but never quite the way you intended.
In pursuit of simplicity, Atmos is harder to use than it needs to be. The interface overall relies on slightly complicated mechanics. It is easy to overshoot and create an artificial look.
Overall, though, it still does the job, and you can still craft some amazing results. It just takes longer than it should.
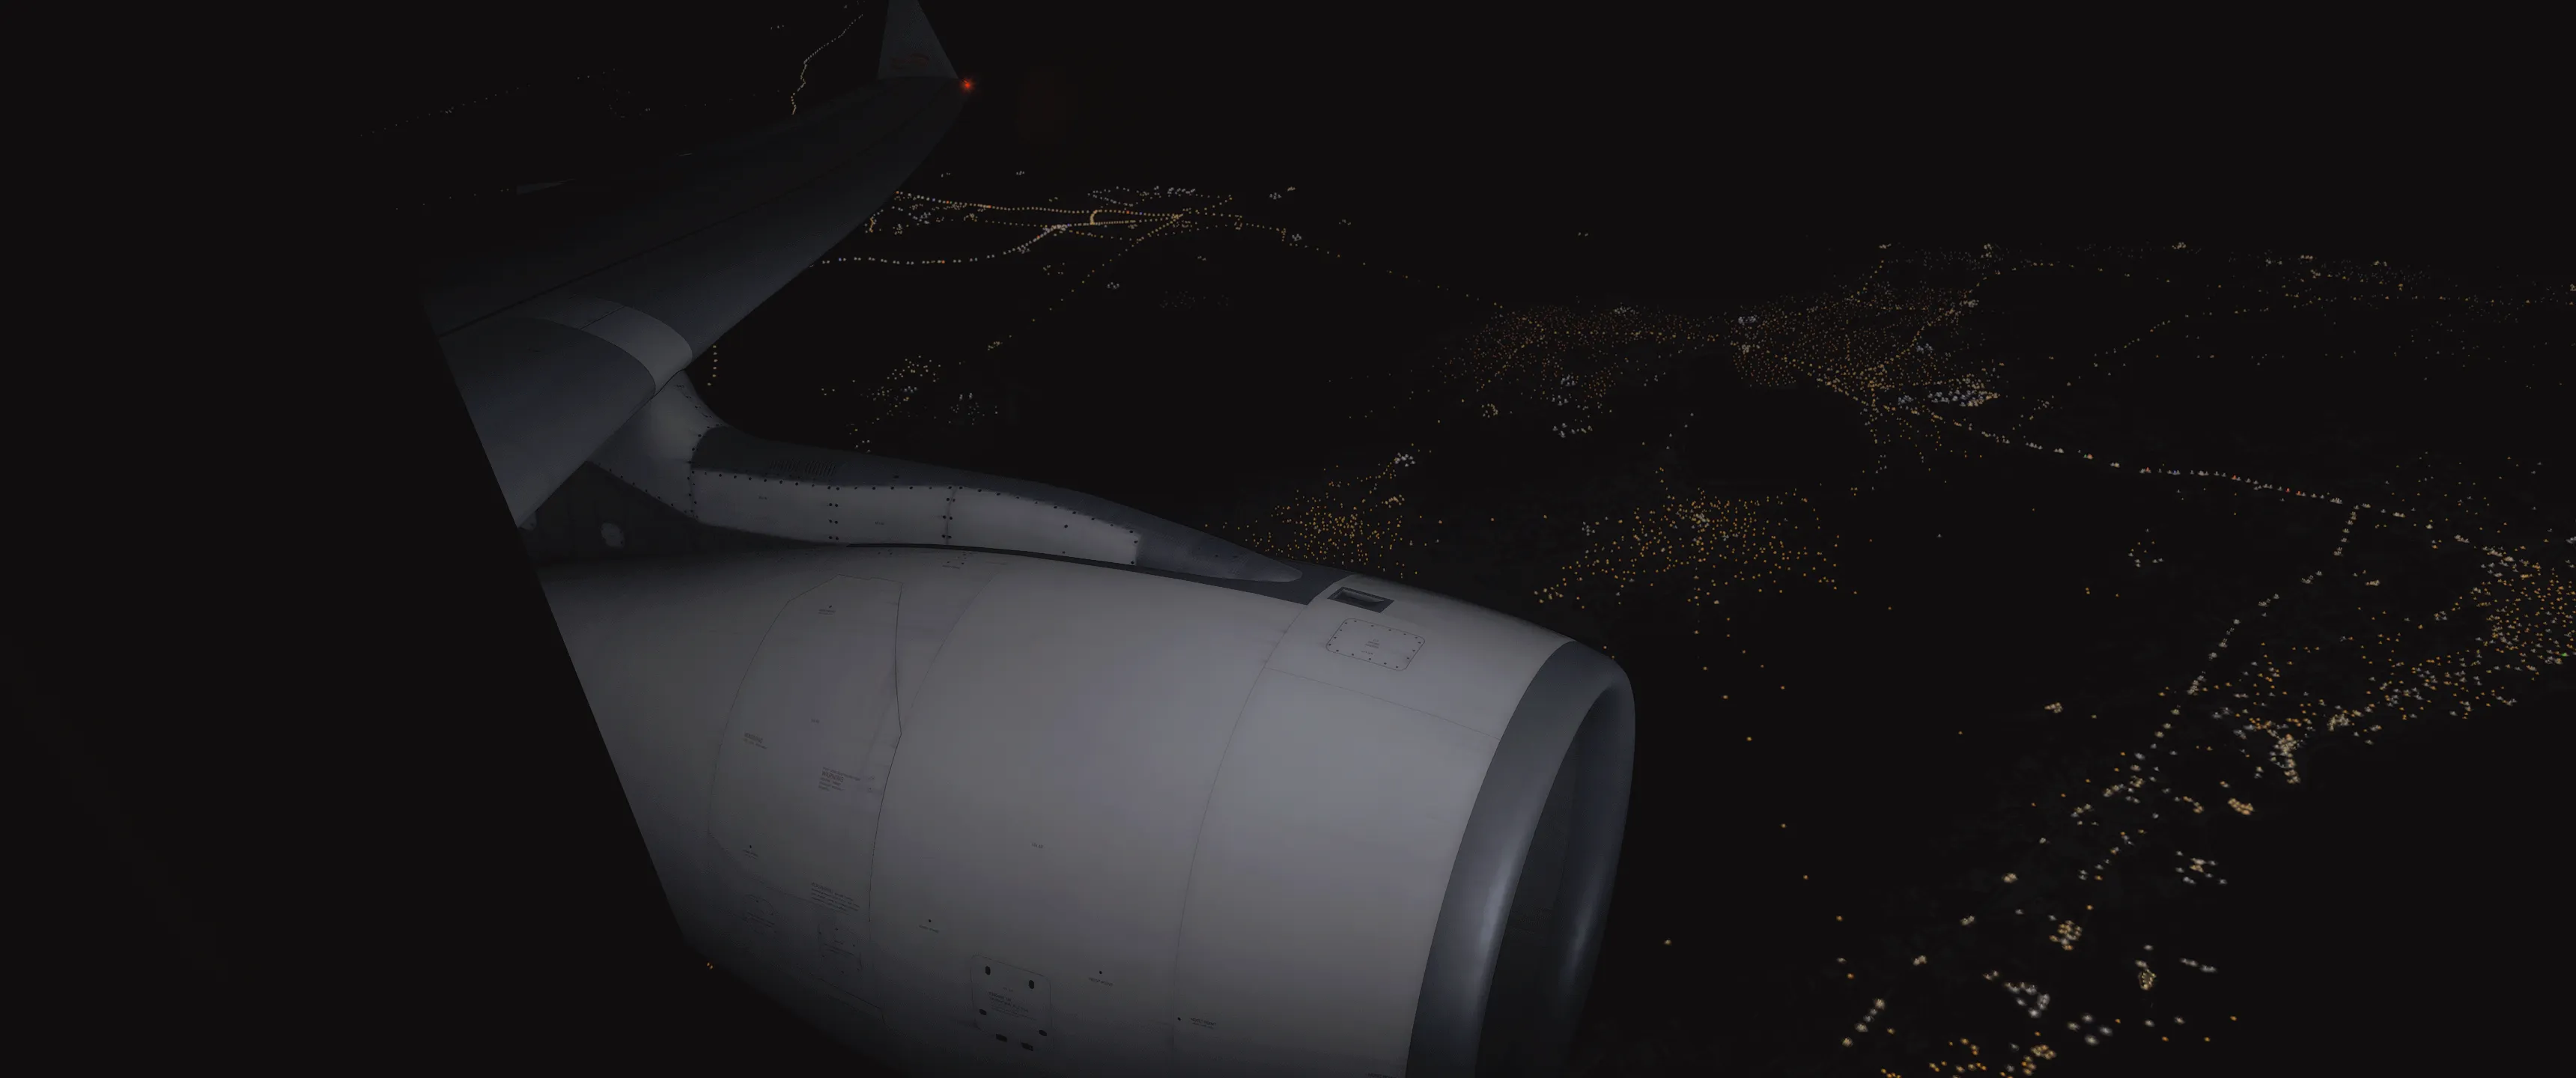
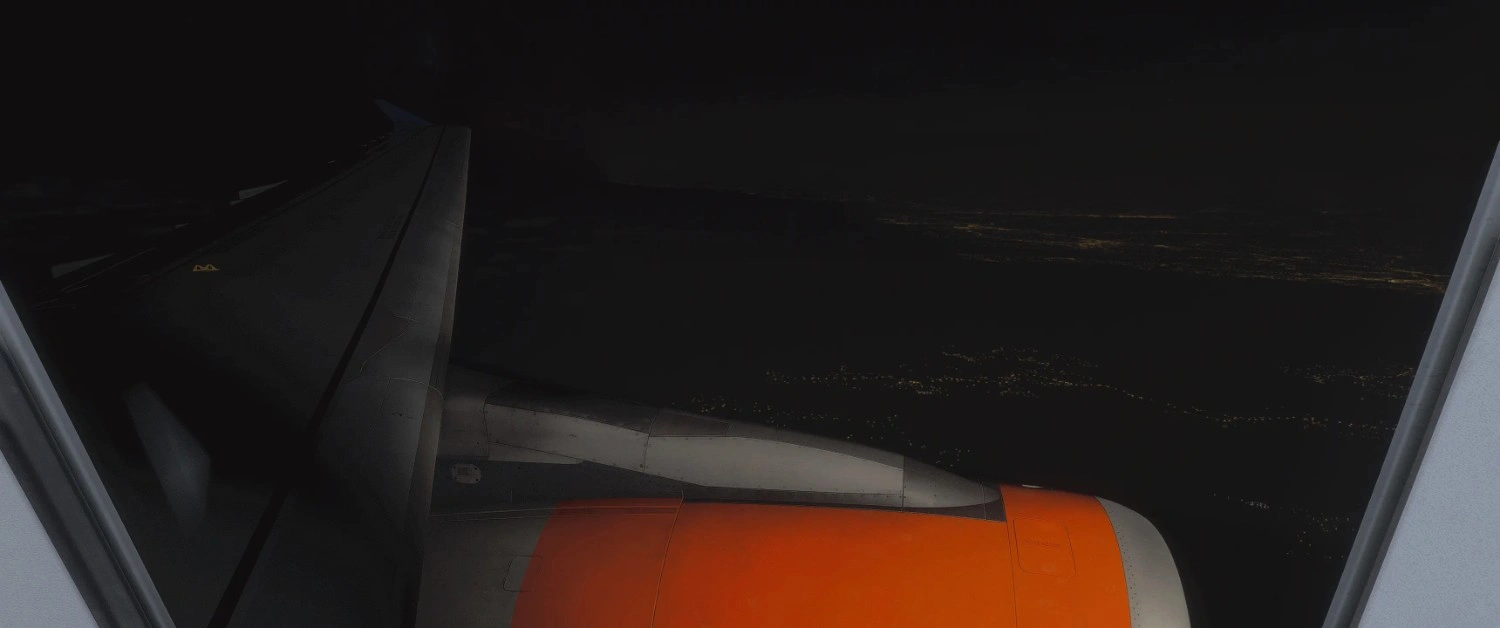
Night Flying And The Sepia Mask
Now, here is where the power of Atmos truly shows itself, at least for those of you still running Sim Update 3.
Microsoft Flight Simulator’s night lighting system has long relied on a global, slightly low-resolution light map to simulate urban illumination from high altitudes. The intention was to make cities and towns appear broadly lit when viewed from afar.
In the end, though, it only resulted in an exaggerated, brown-tinted glow that blanketed the entire planet at night. In MSFS 2024, this effect is particularly noticeable: fields and deserts that lack artificial light still appear to glow in the dark.

The glow also increases horizon bloom, and can make roofs look as if they are lit from above, flattening the scene and removing the natural contrast between lit and unlit areas.

Thankfully, Atmos reduces this effect. It can’t remove the sepia mask entirely, but the right preset can tone it down. Don’t use these night-optimised presets during daytime, though, as they’re tuned specifically for night conditions.
On Sim Update 4 or later, the sepia mask has been mostly fixed by Asobo, so these presets are largely redundant.
Results
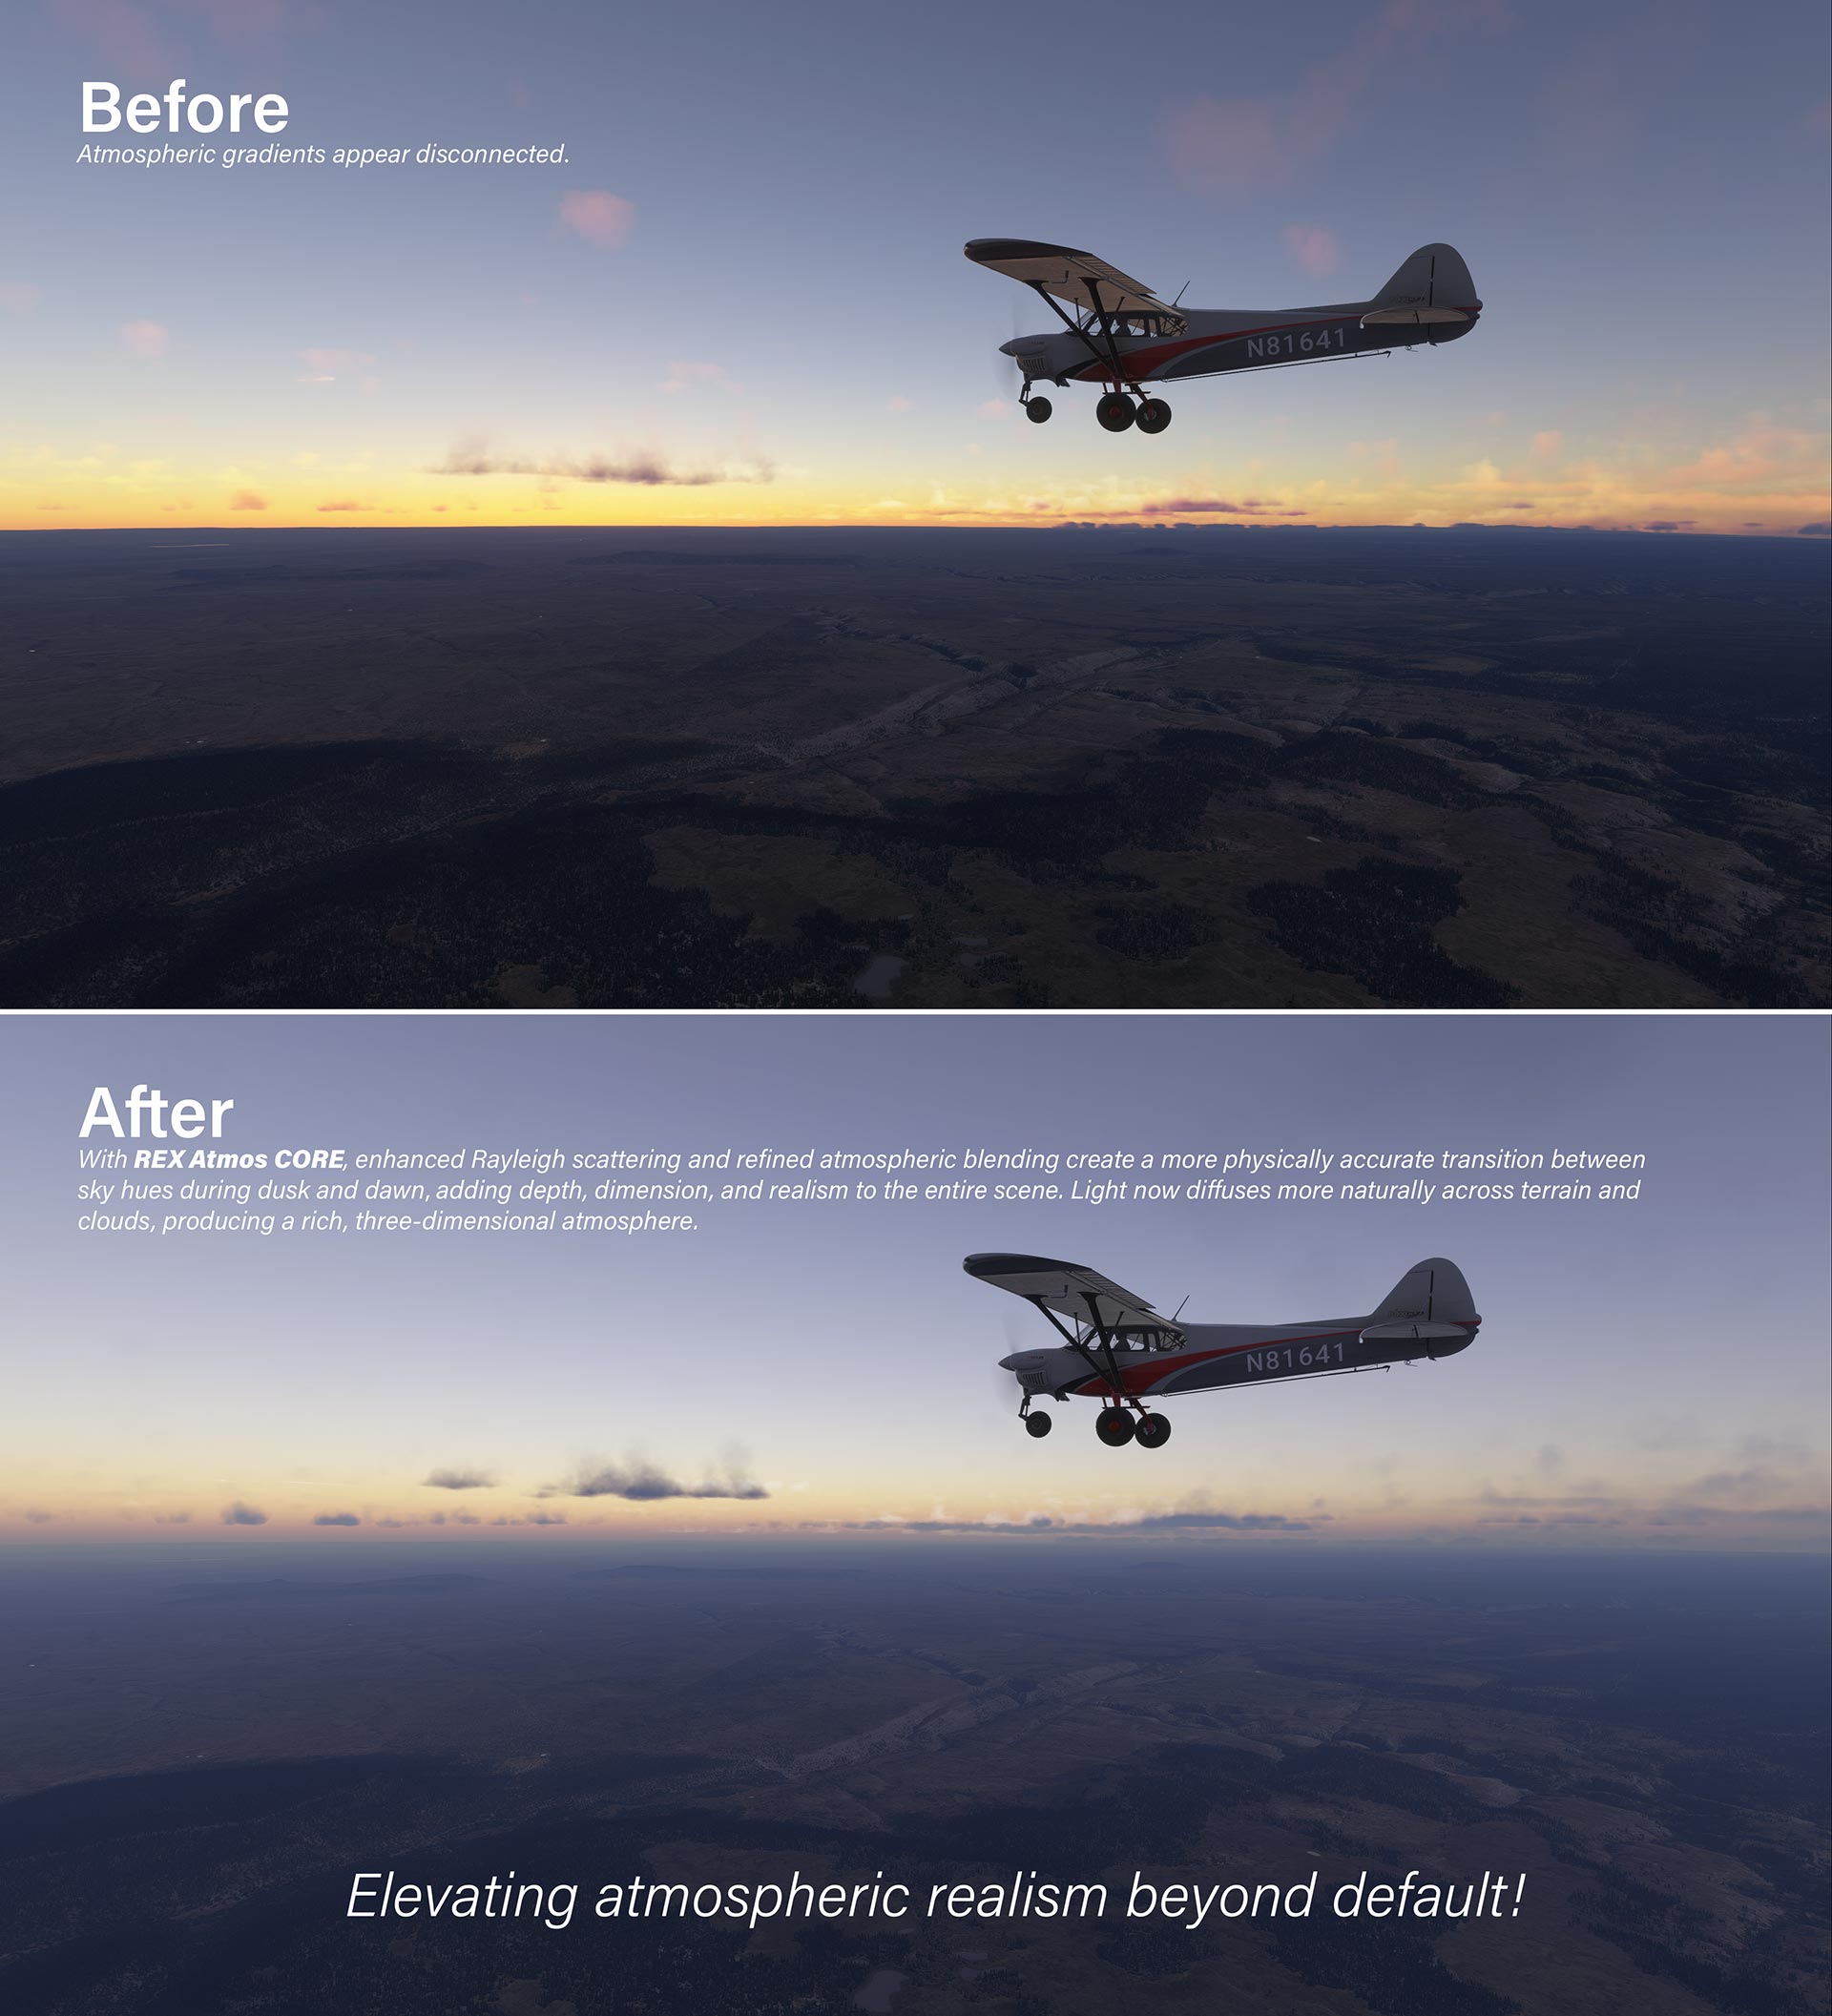
As for the broader improvements, the difference became immediately clear once I settled on a good baseline. For reference, I’m using Andrew Bennett’s “AB” presets across all three categories, with a few personal tweaks to taste.
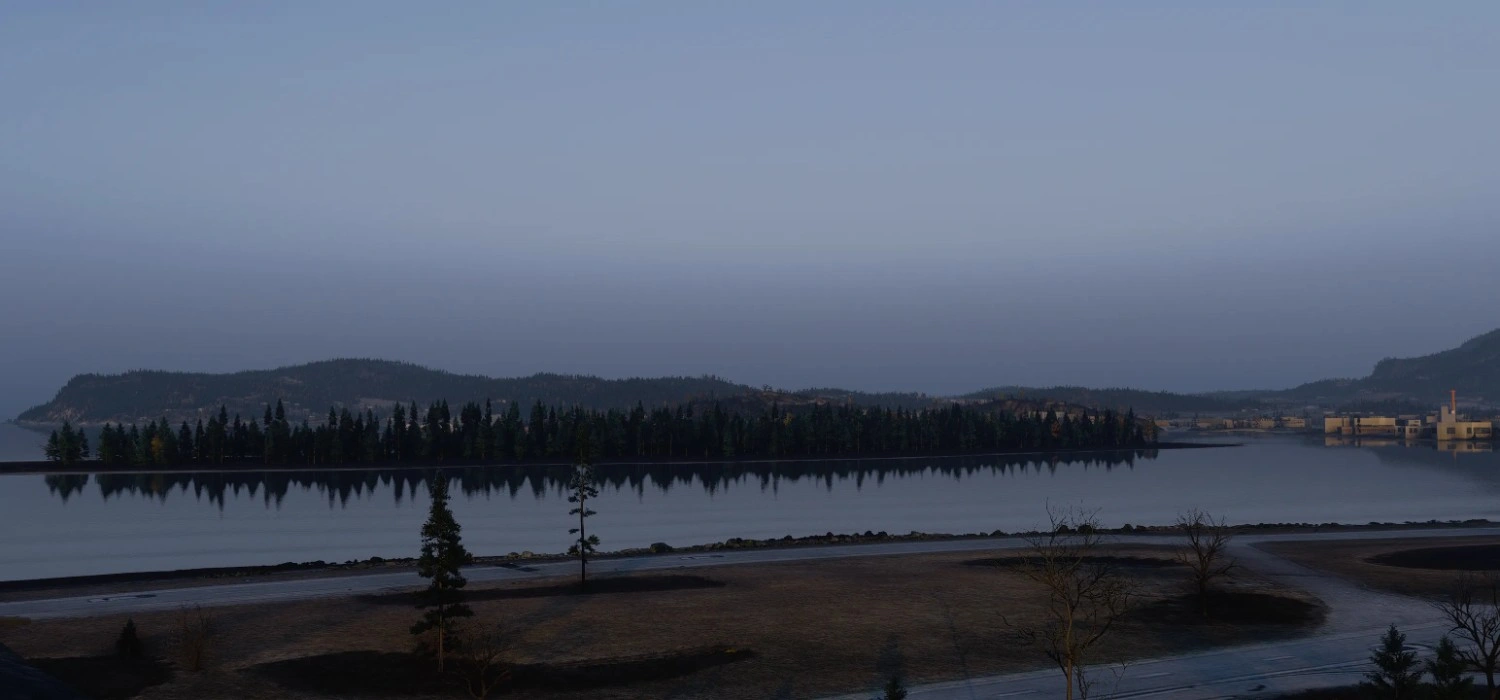
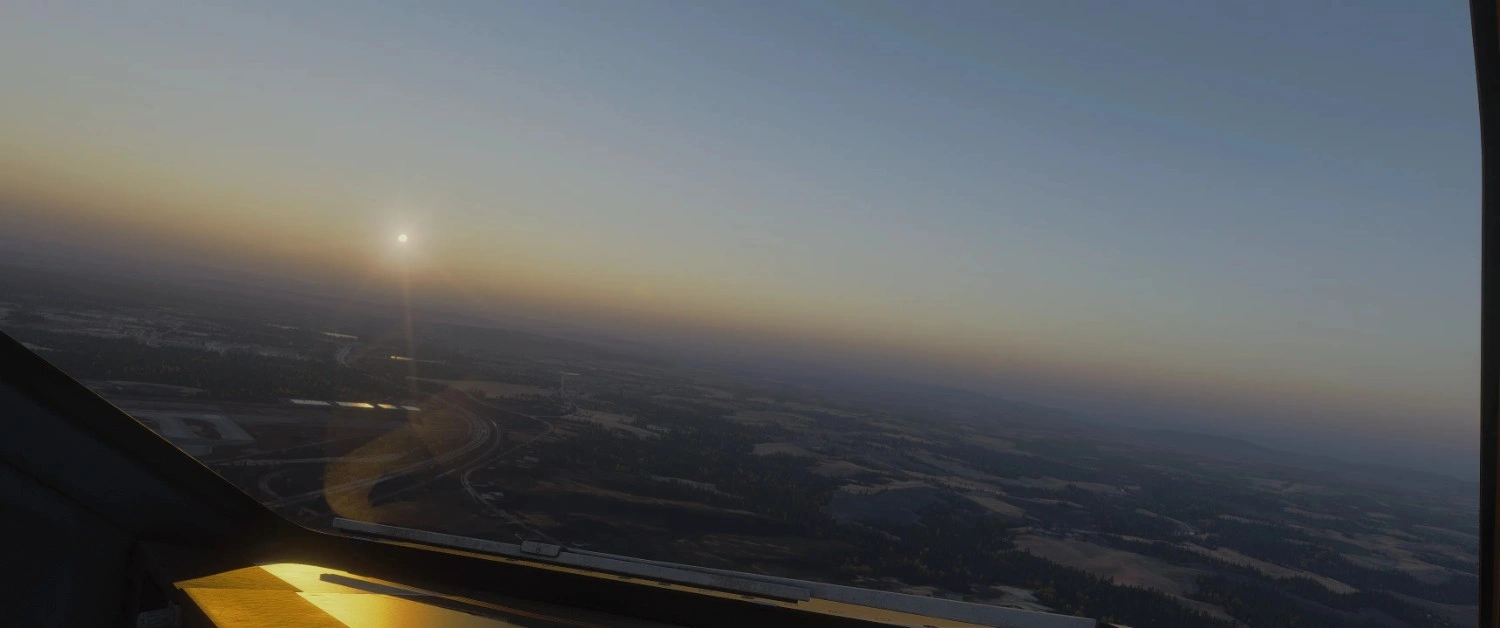
With the right preset, surface visibility becomes far more realistic: the sky thickens and appears humid or dust-streaked, rather than the default, near-infinite clarity; the air gains depth and substance; and horizons blend in more naturally.
.webp)
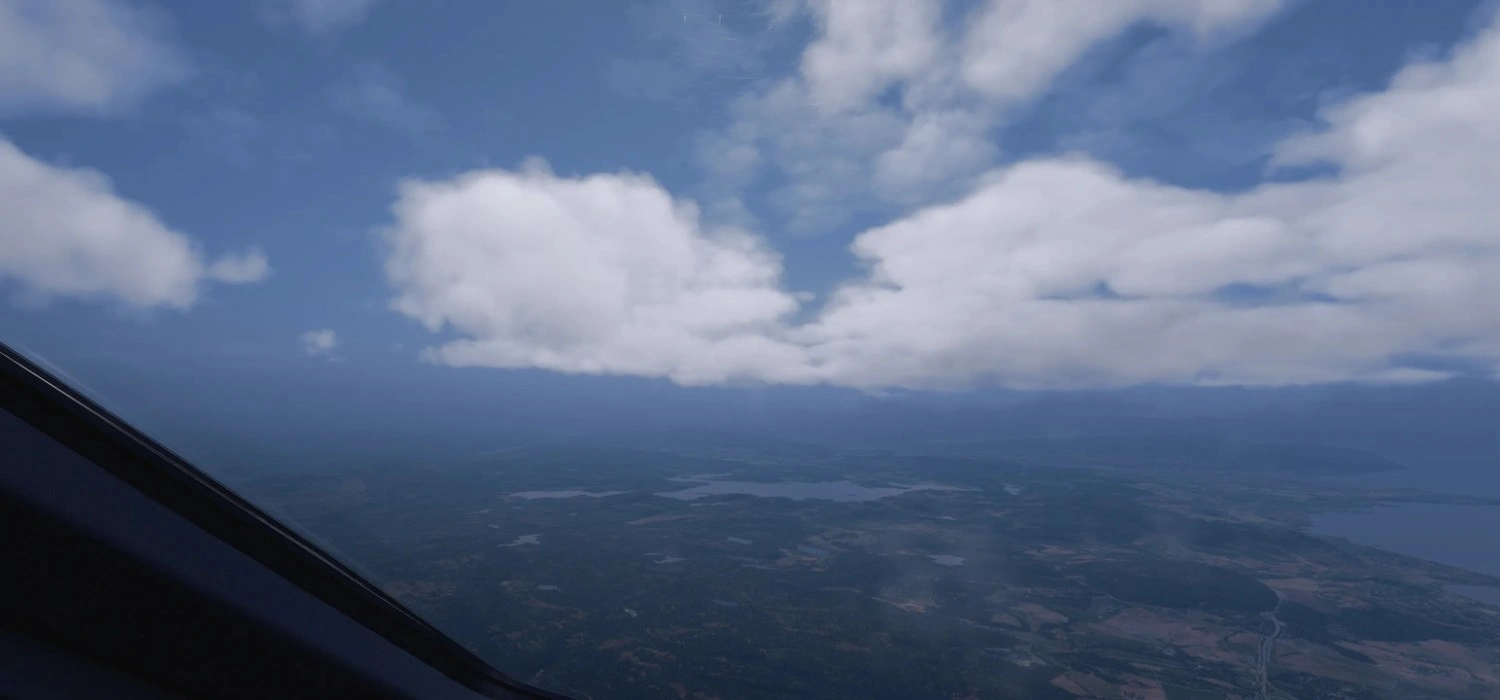
The stock yellow hue can be corrected, so sunrises and sunsets show better colour separation, with clouds reading more naturally within the hazy column, rather than glowing or turning sooty.

.webp)
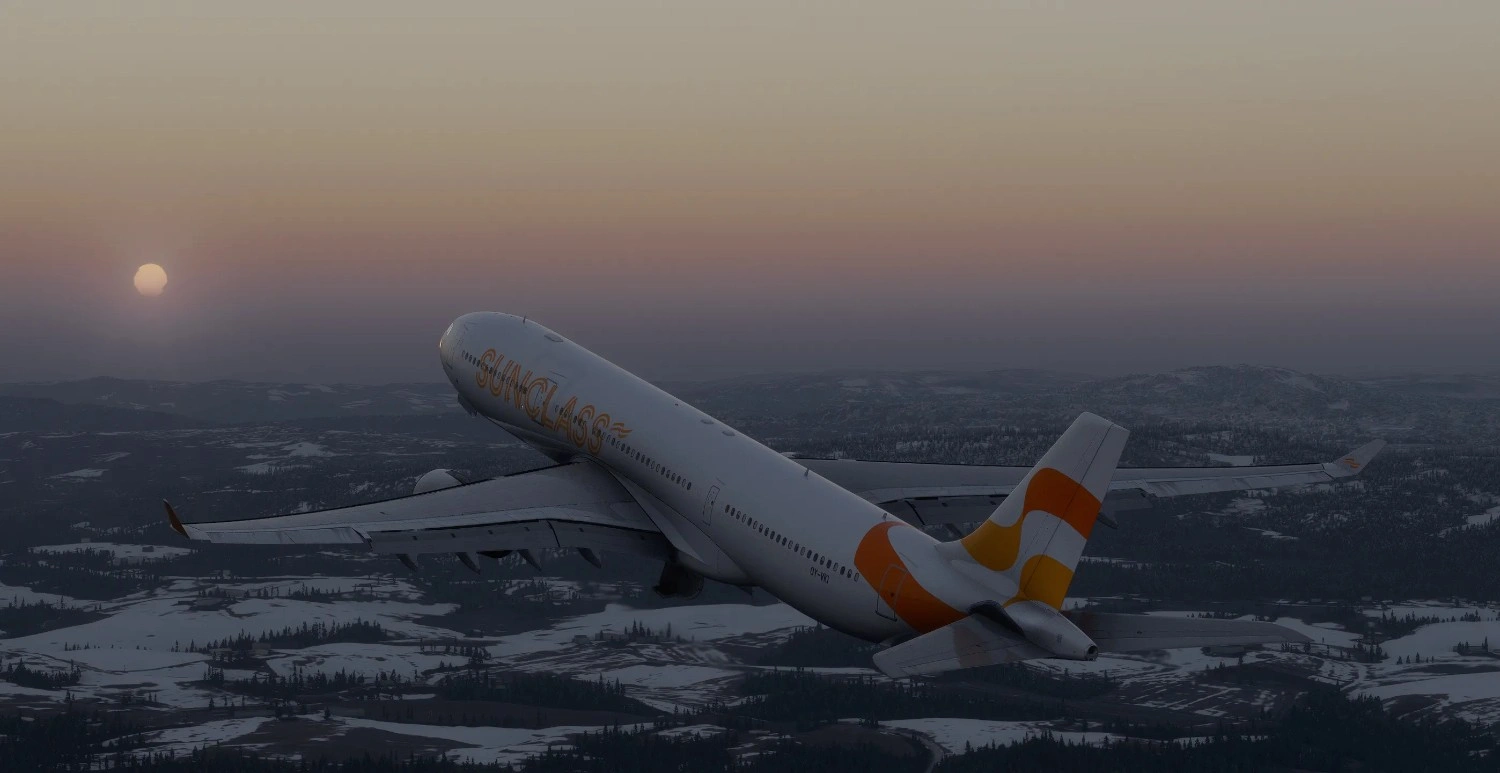
Night lighting improves significantly, with the sepia mask removed, and city lights looking much more realistic.
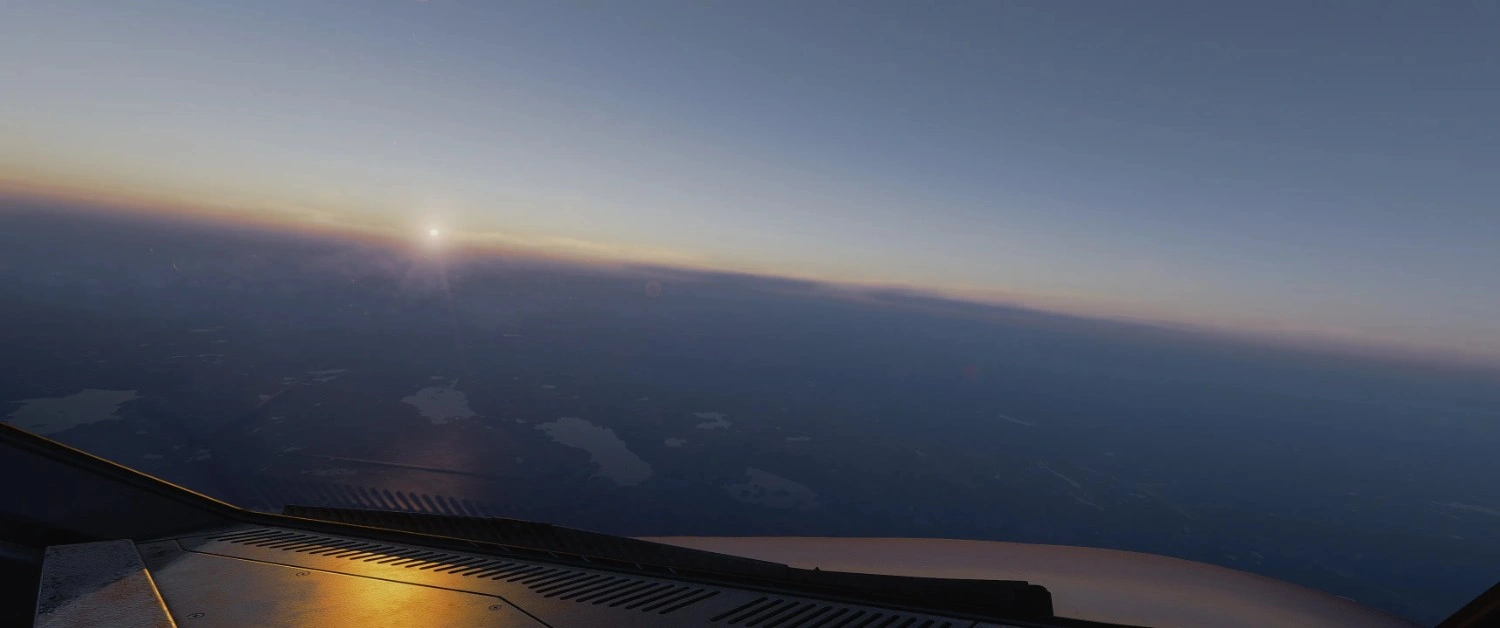
Overall, I enjoyed deeper blues, smoother sunset gradients, and more natural cloud shadows, after only a short time in the editor.
I did find that many user-created presets tend to lean too heavily into deep blue tones, with midday often looking unnaturally blue for my taste.
.webp)

One thing to keep in mind is that a preset can look perfect one moment, and completely off the next. Because Atmos is tuned to the current time and weather, its presets are not dynamic and don’t adapt as conditions change.
This means you’ll often need to use different presets for varying weather types and times of day, which can be cumbersome and may not always provide the desired results. If you can live with “good enough,” you’ll get consistent, reliable results.
Alternatively, you can always build a small library of presets for different lighting and weather conditions, to switch between as needed.

Ultimately, everything about this program is subjective, and Atmos is context-sensitive: a preset that looks good at midday can look bad at dusk in overcast. Not every setting looks good in every condition, and no single preset is a fix-all.
You might spend hours crafting a look you’re proud of, only for someone else to call it the worst preset they’ve ever seen. Some people might not notice any difference from default MSFS, or even think Atmos makes things worse.
The impression it leaves varies wildly depending on your setup, monitor calibration, personal preferences, visual experience, and knowledge. Everyone’s taste differs, and few will agree on what looks “best.” It takes work and testing to build a preset that holds up in most situations, and every weather scenario can tempt you into more tweaking.
But once you find a balance, I find the results to be a substantial improvement over stock MSFS 2024, especially in the haze and sky behaviour, which finally feel like actual air. It simply looks stunning.
Takeaway

To truly appreciate what Atmos does, you need a bit of an eye for detail, and the patience to chase minor visual improvements, that others may never even notice. For those who value nuance and subtlety in how light, haze, and colour behave, Atmos can be incredibly rewarding.
Still, it's incredibly easy to get lost in the sliders, and the clunky, unrefined and imprecise interface. The oversized controls make fine adjustments frustratingly complex, and the manual doesn’t help much either, offering little explanation of what each function actually does, leaving you to trial and error to achieve the results you want.
Despite all that, I still can’t imagine flying without Atmos. As someone who’s long been frustrated with aspects of how MSFS looks, I’ve been waiting for a tool like this since the 2020 version. It’s not perfect, and has its quirks, but when you learn to use it properly and finally get it right, the payoff makes up for the clunky experience.
Conclusion
So, is Atmos CORE worth trying out?

Atmos CORE sets out to give simmers more control over how air, light, and weather are represented in MSFS 2024. After spending time with it, I think it largely delivers on that promise. The improvements to sky colour, haze depth, lighting behaviour, and overall visual realism can be significant, and once you find a preset that works well for your setup, the difference is noticable.
However, the UI lacks finesse, the sliders are imprecise, and there is definitively a learning curve. Getting the most out of Atmos requires time, patience, and a fair bit of tweaking. Not every setting will suit every condition, and results vary, depending on your preferences and monitor.
Still, despite those limitations, the visual payoff is real. If you care about atmosphere and are willing to put in the work to shape it, Atmos offers a level of control and nuance that the base sim simply doesn’t. It won’t be for everyone, but for me, the improvements are worth the effort, and I feel confident recommending it to others who value visual fidelity, and are comfortable putting in some effort for it.
.webp)
Until Asobo and Microsoft take full ownership of their own weather engine, I think this is about as close as we’ll get.
Pricing
If you already own REX Atmos for MSFS 2020, you are eligible for a 50% discount, bringing the price down to just $7, provided you purchase the new version from the same vendor.
For new customers, Atmos CORE is available via the REX Store for $14.50 excluding sales tax, as well as through Simmarket, Contrail, Orbx, Just Flight, Aerosoft, and Flightsim.to.
A big thank you to REX Simulations for providing us with a copy to review!
Share this page


COMMENT ADVISORY:
Threshold encourages informed discussion and debate - though this can only happen if all commenters remain civil when voicing their opinions.